TekMatix Blog & Help Articles
Use the search bar below to look for help articles you need.
How to set up Google Ad Conversion Actions
Google AdWords has a feature called conversion tracking. This allows you to track the success of your ads and optimize them accordingly. It’s an essential tool for any advertiser who wants to maximize their return on investment (ROI).
A conversion can be a specific customer action that you've defined as valuable to your business, such as an online purchase or phone call. Conversion tracking shows you what happens after a customer interacts with your ads -- whether they purchased a product, signed up for your newsletter, and called your business.
In this article, we will show you how to set up conversion tracking in Google AdWords action in workflows so that you can start optimizing your campaigns.
Note before getting started [ How to setup Google Ad Reporting ]
1. Please check that you have integrated the correct MCC id and Google Id to the location and that the email associated has the highest permissions (admin).
2. UTM Tracking template is added to Google Ad Account, in Account settings or campaign settings or ad level setup. (It can ONLY be present in one place)
Troubleshoot Guide For Google Ad Reporting
Covered in this article:
How to set up the Google Ad Conversion Action
Step 1: Head into your Google Adwords account and click on the Tools and Settings tab, Click on Conversions in Tools and Settings
Step 2: let's set up the Conversions goals
Step 3: Let's give the Conversion a Name
Step 4: Select the value for your conversion.
Step 5: Setup the conversion window and attribution model
Step 6: Now let's create the Workflow in the System
Form Submission/Order Purchases/Survey Submission
Incoming Phone Call
Number Pool Calling
Chat Widget
Troubleshooting
I have set up my conversions now how do I know it's working?
Where can I see my conversions?
How to set up the Google Ad Conversion Action
Step 1: Head into your Google Adwords account and click on the Tools and Settings tab, Click on Conversions in Tools and Settings
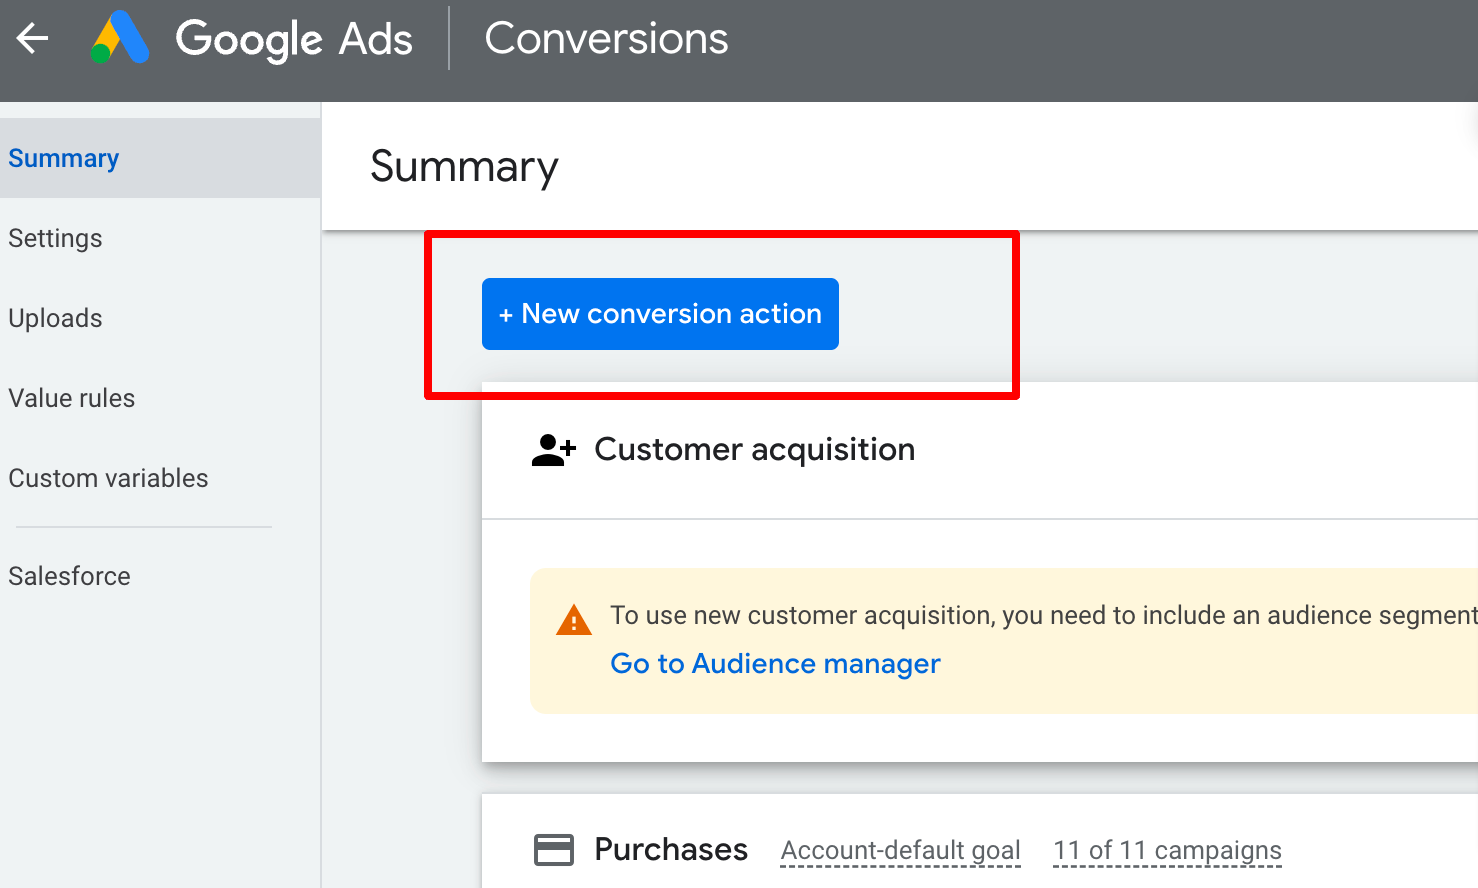
Click the "+ NEW CONVERSION ACTION"
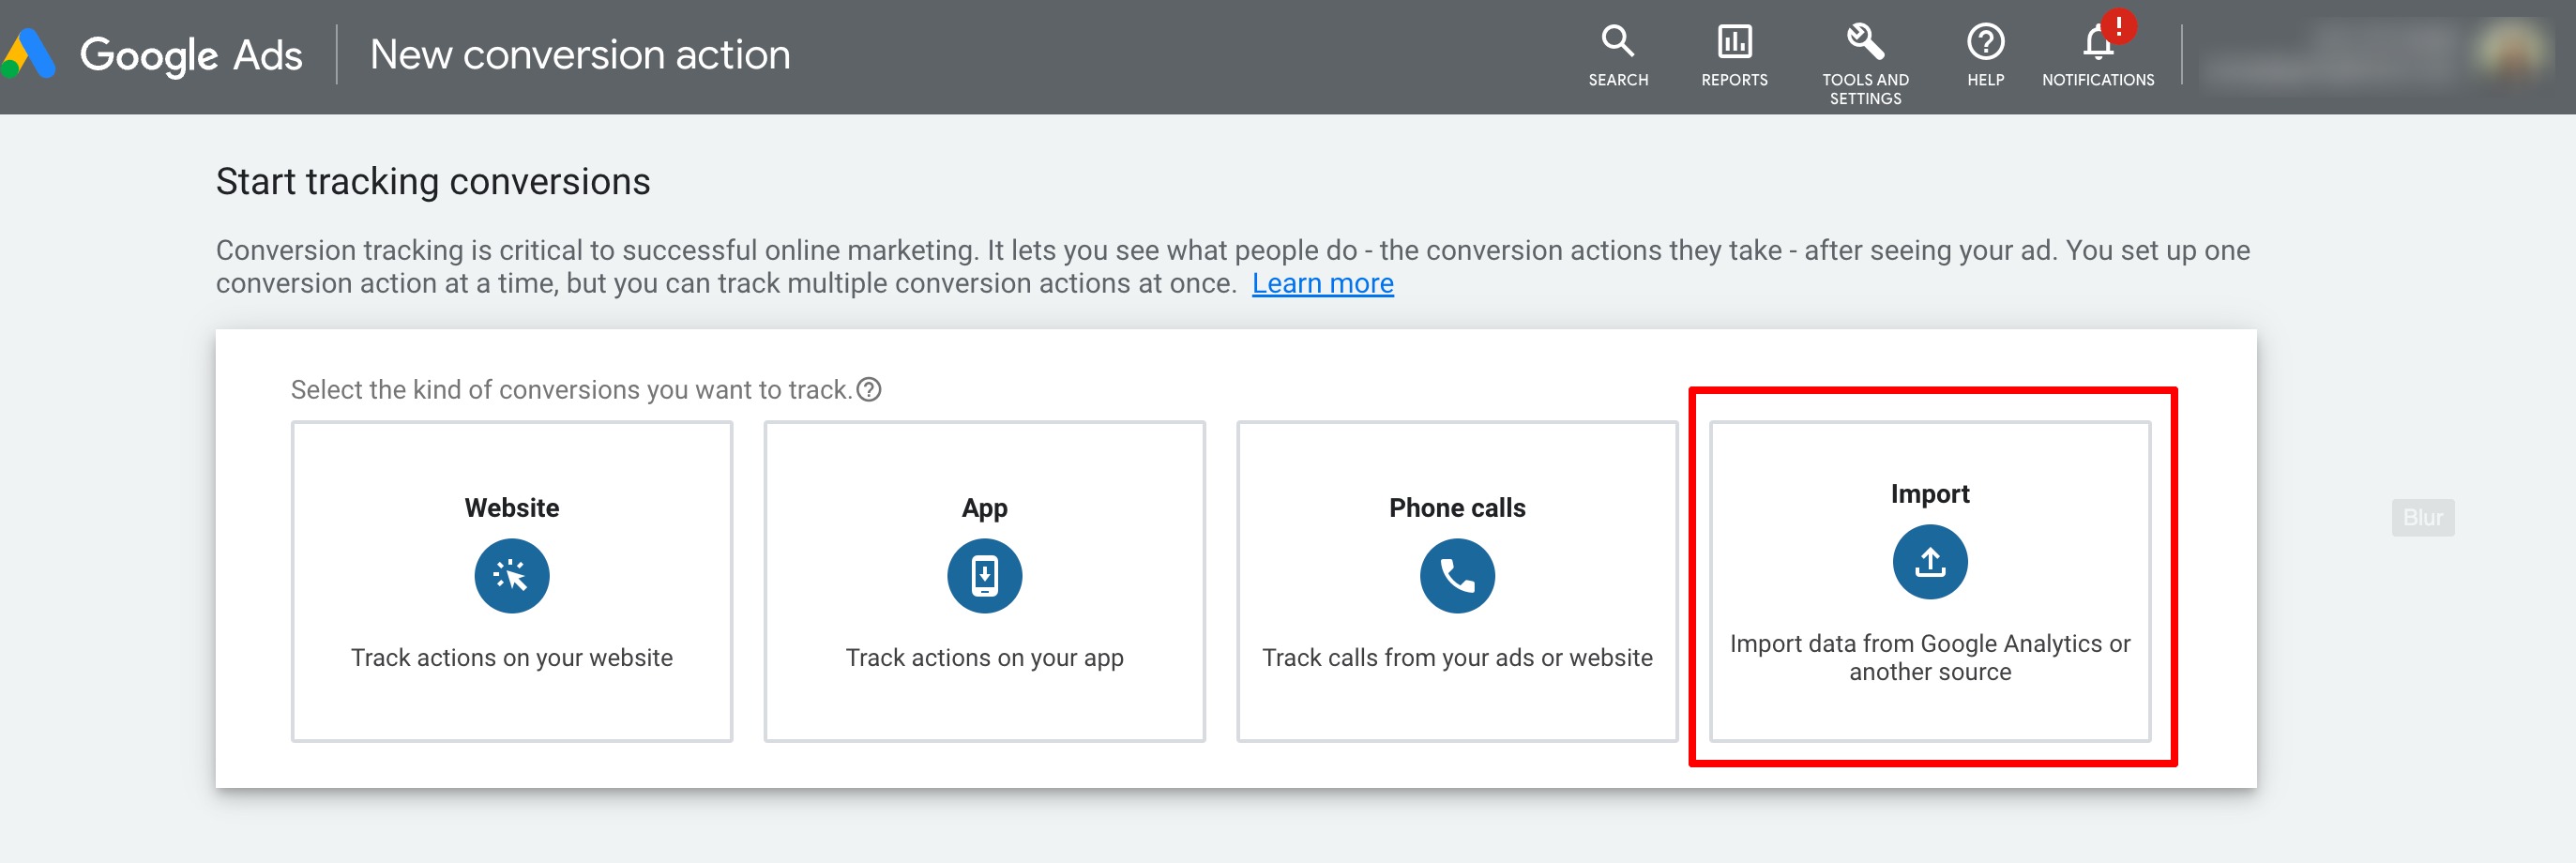
To start tracking conversions, we need to choose the import option.
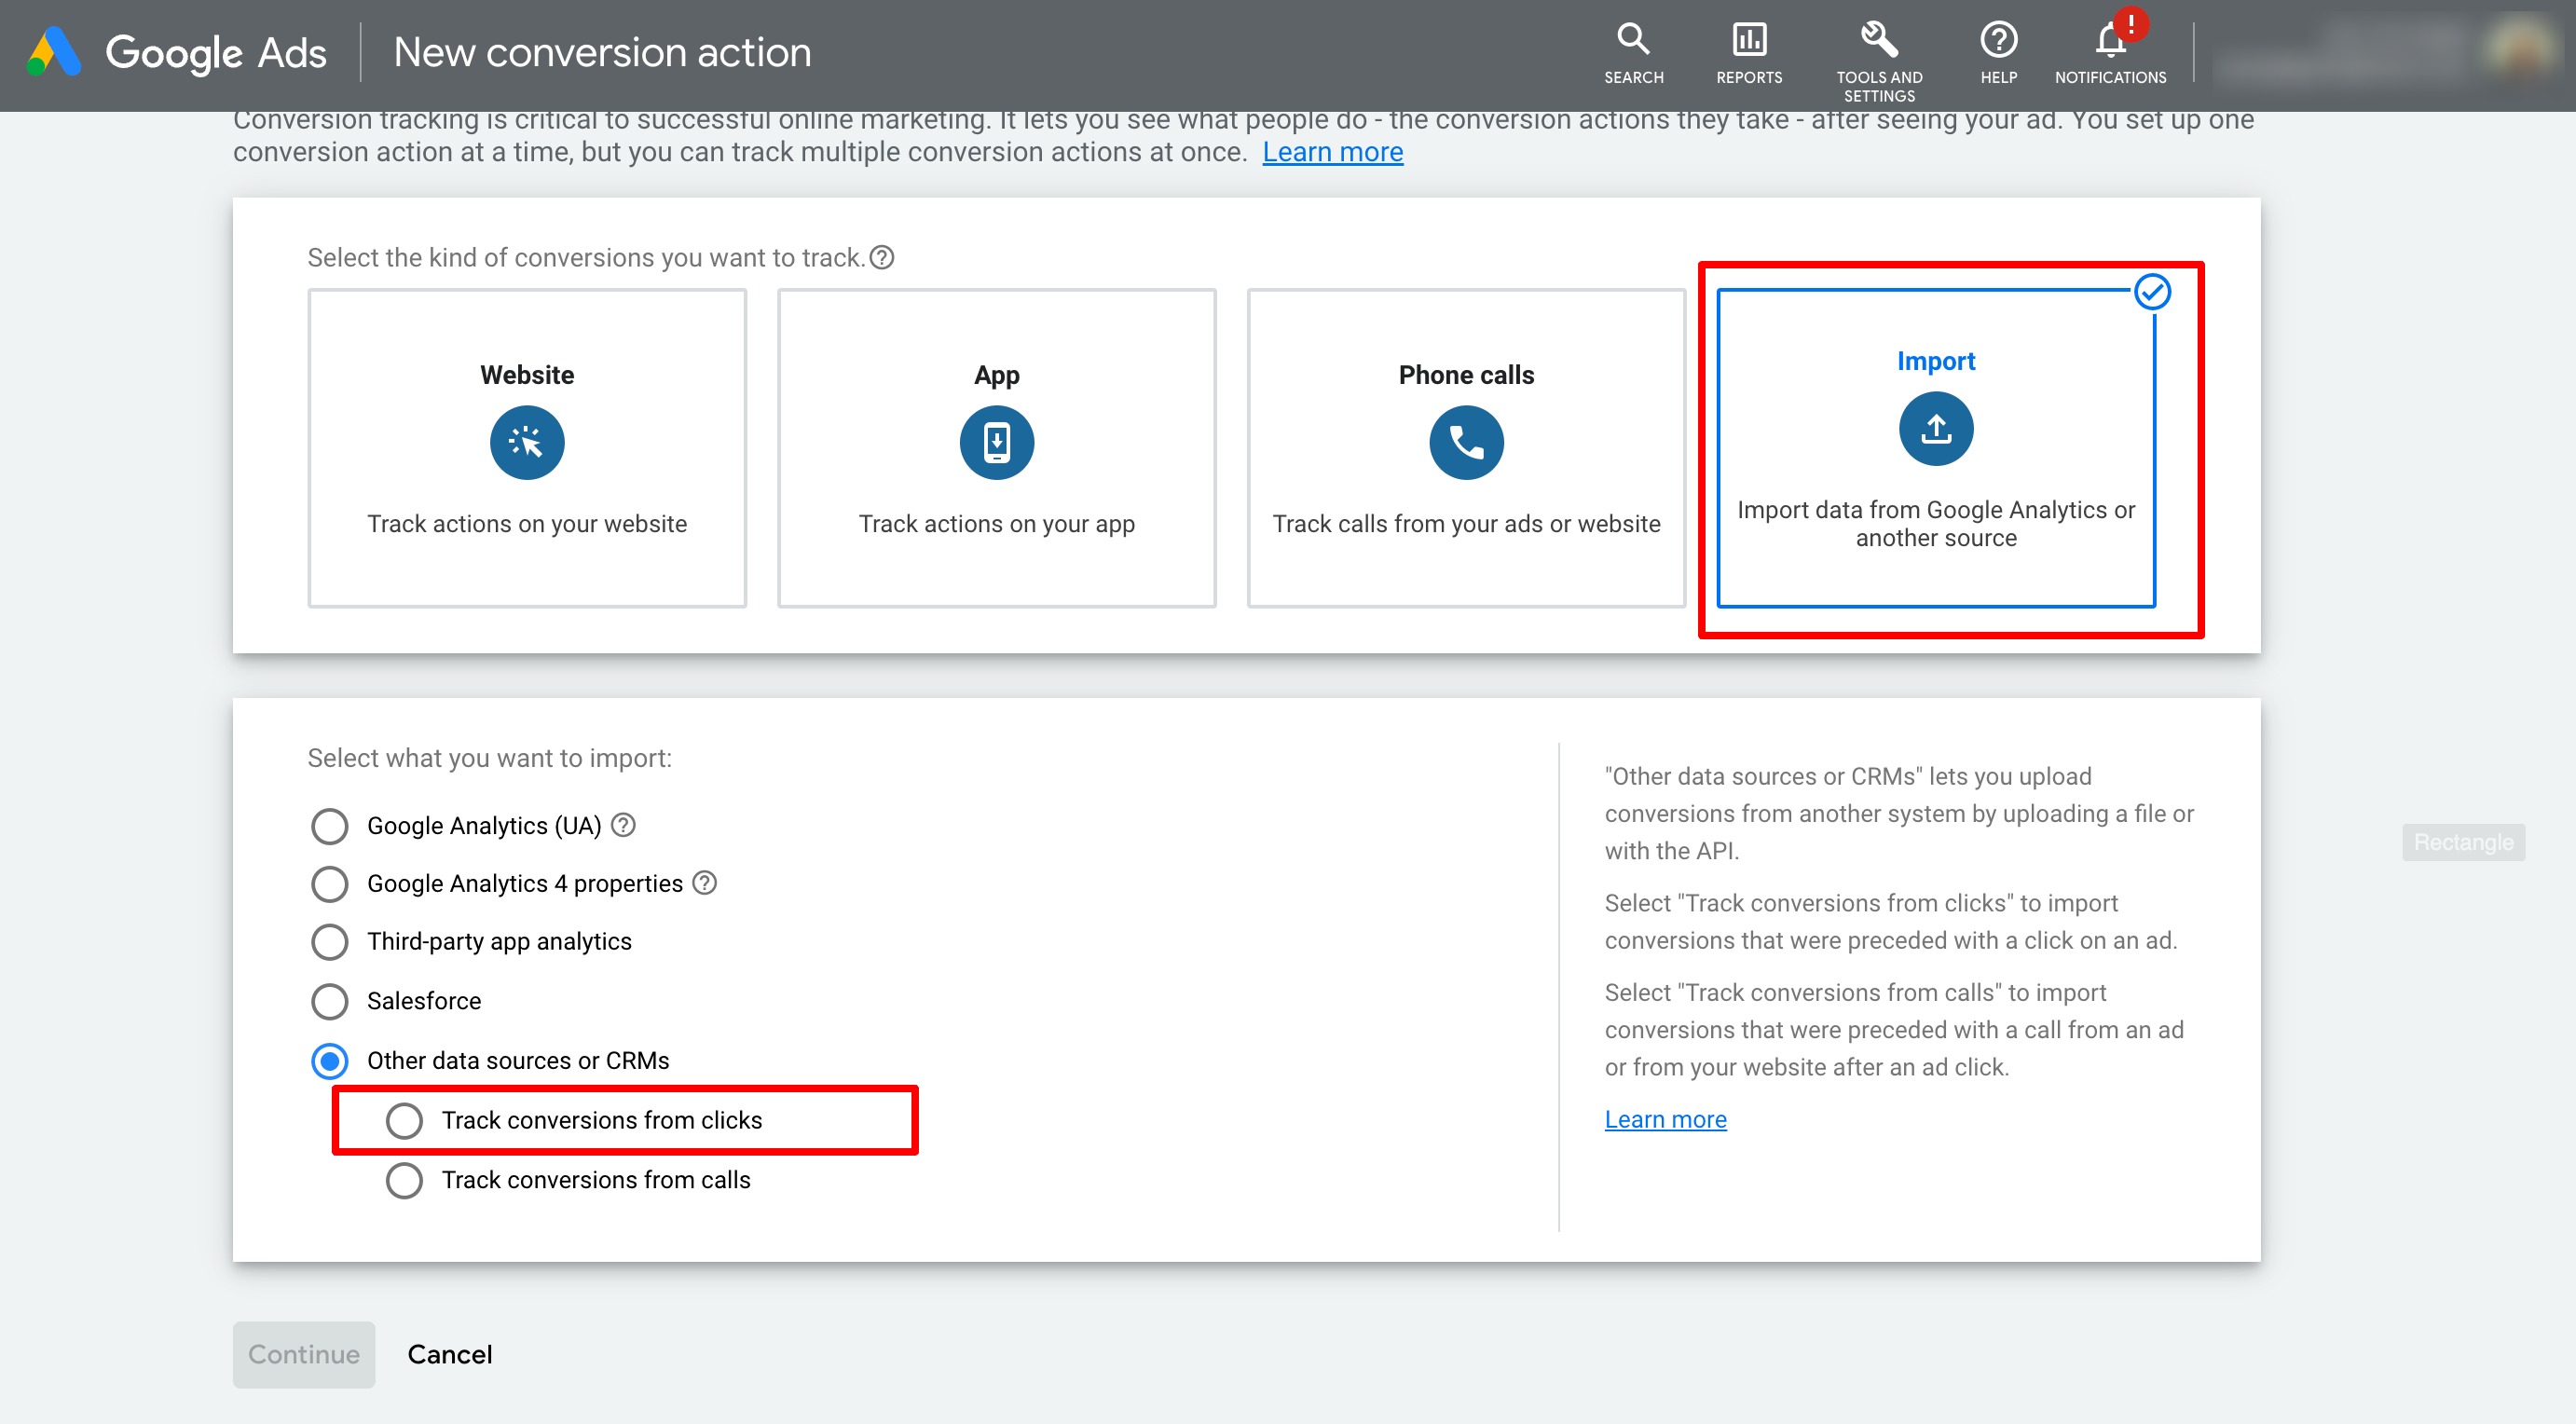
Select "Other data sources or CRMs"
Step 2: let's set up the Conversions goals
For the Goal and action optimization section below select "Converted Lead" as the Primary option.
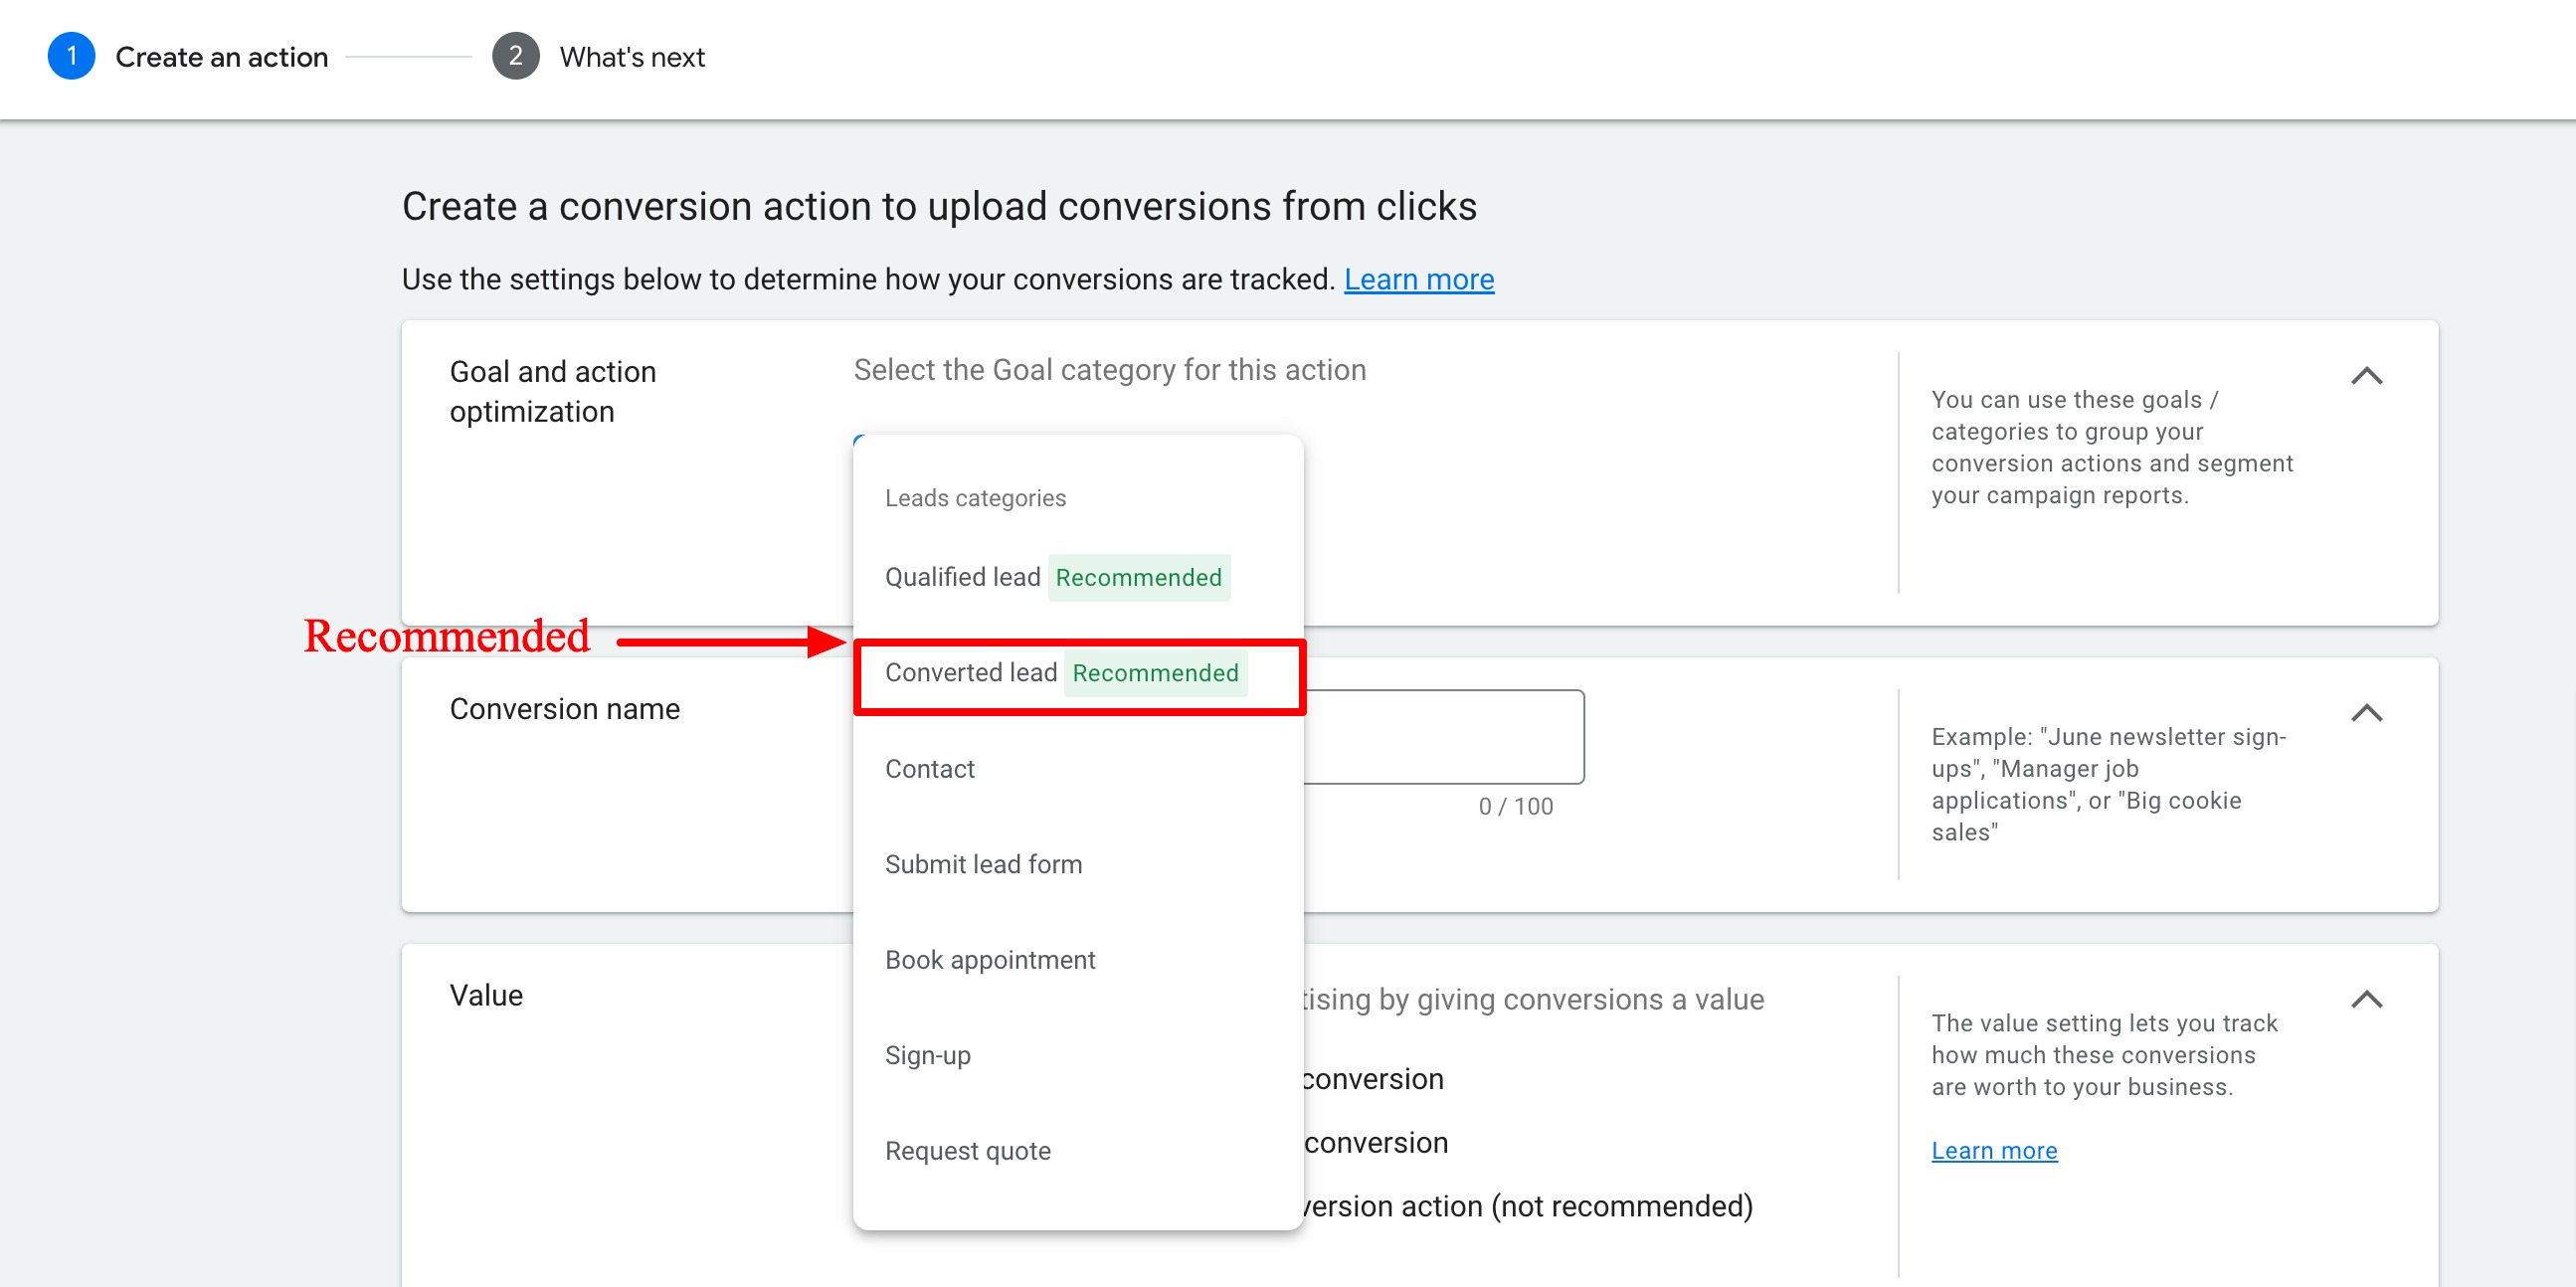
Step 3: Let's give the Conversion a Name
Please type in the name of your conversion. In this example, we are calling it "TekMatix Click".


Step 4: Select the value for your conversion.
Select from: same, different, or don't use a value... More info


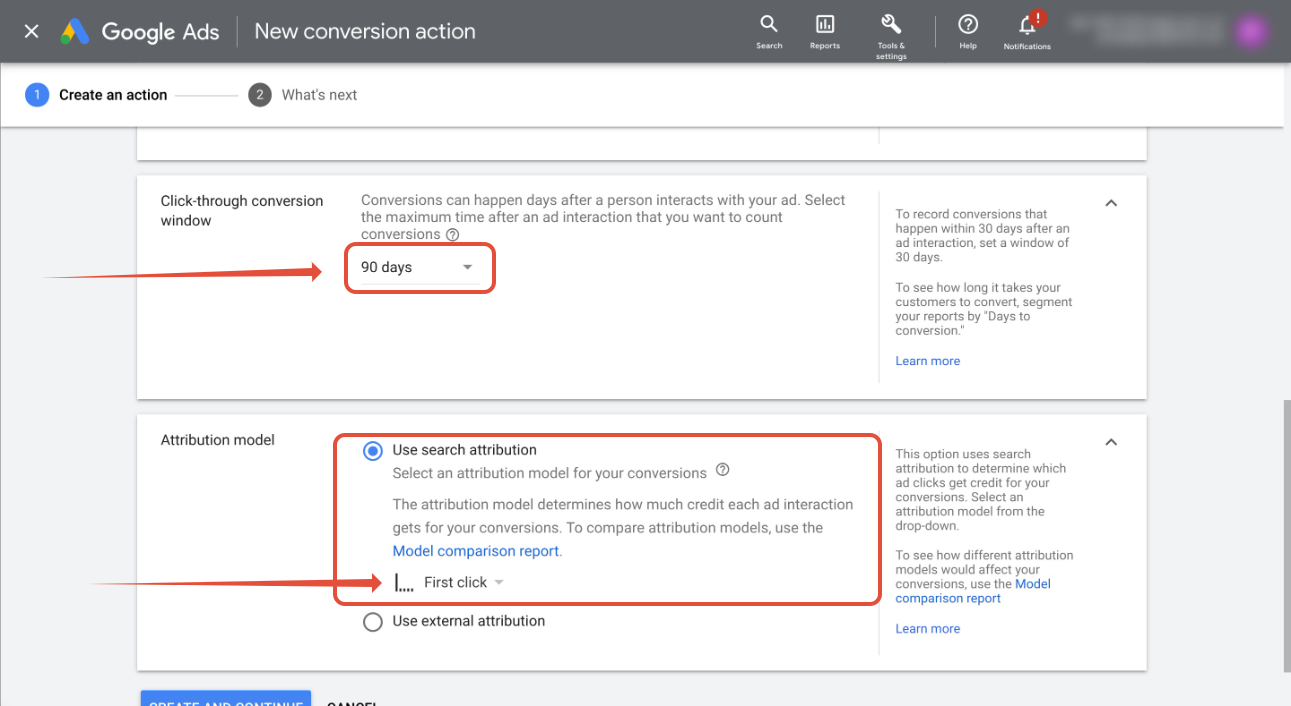
Step 5: Setup the conversion window and attribution model
1. Set the click-through conversion window to "90 days"
2. Next, set the Attribution model as "First click" or "Latest click" (recommended)... more info
Step 6: Now let's create the Workflow in the System
Workflow can be created for Form Submission, Order Purchases, Incoming Phone Call, Number Pool Calling, Survey Submission, and Chat Widget.
Form Submission/Order Purchases/Survey Submission
Incoming Phone Call
Number Pool Calling
Chat Widget
Please Note:
Every time you create a new campaign in Google, you will need to select "other" as your Google Adwords option in your new workflow.
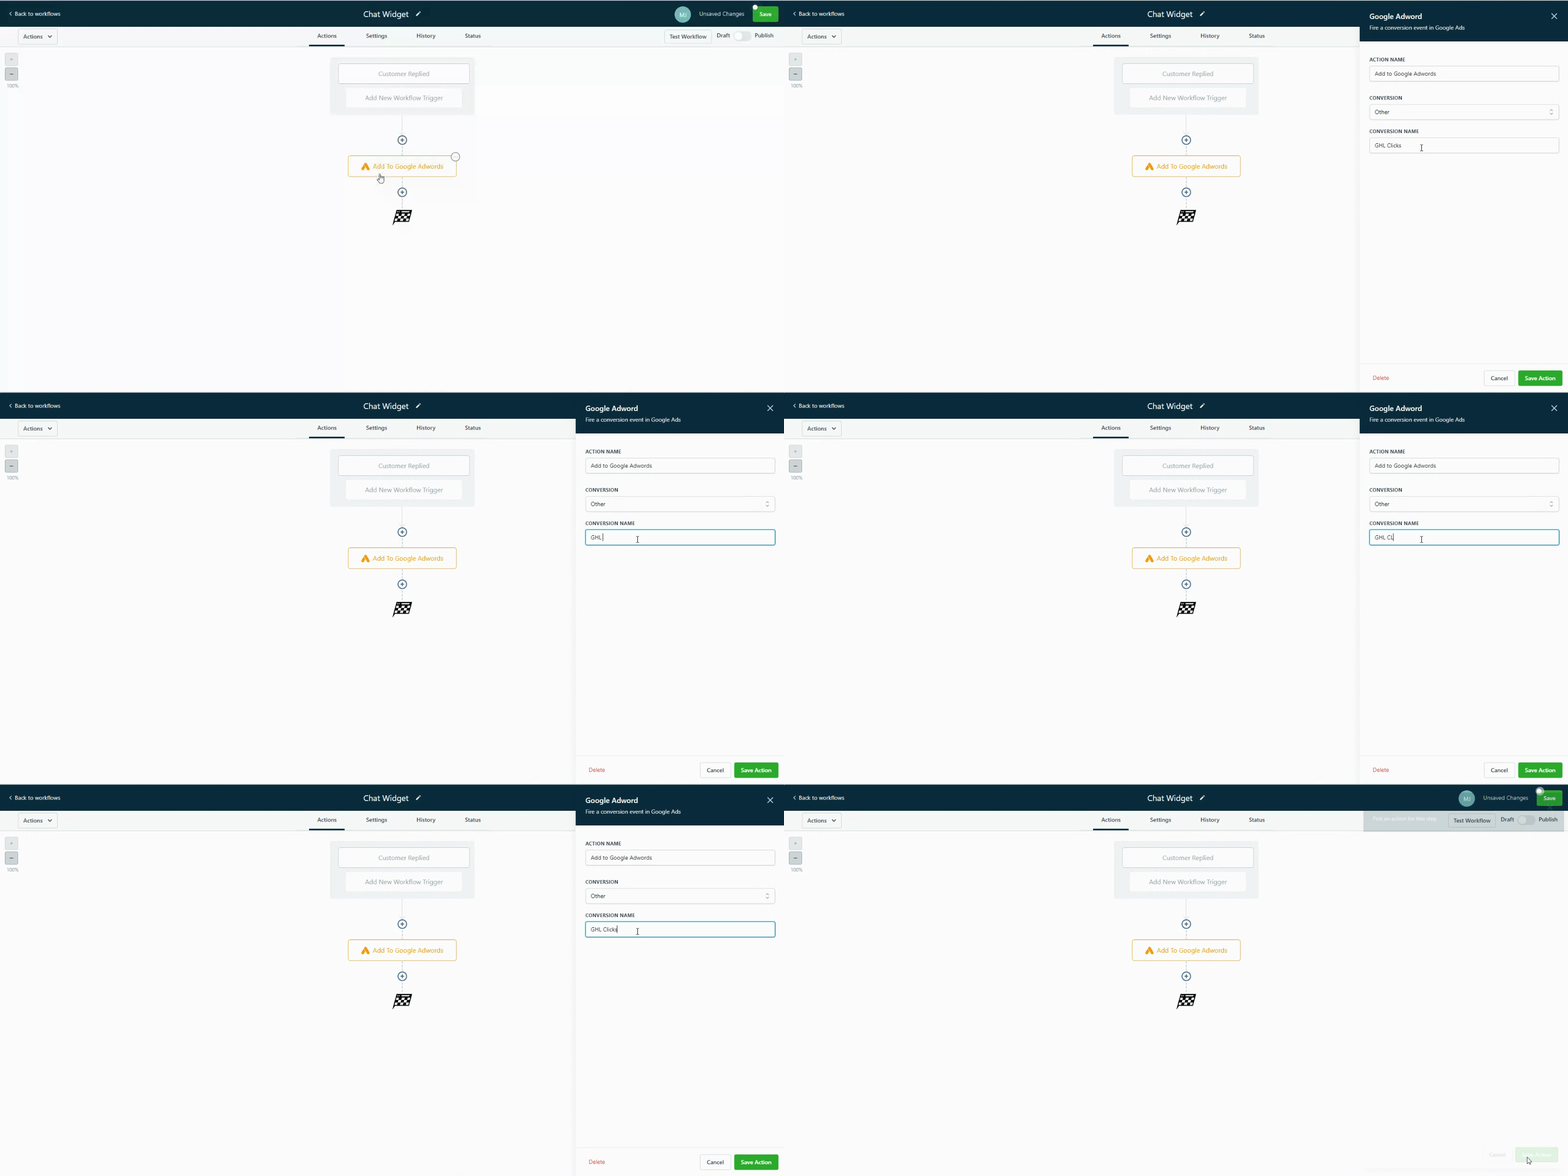
It will take 24 hours once we receive one contact with UTM source and gclid to get the list populated in workflow trigger as well as in Google Adwords Conversion.
Form Submission/Order Purchases/Survey Submission
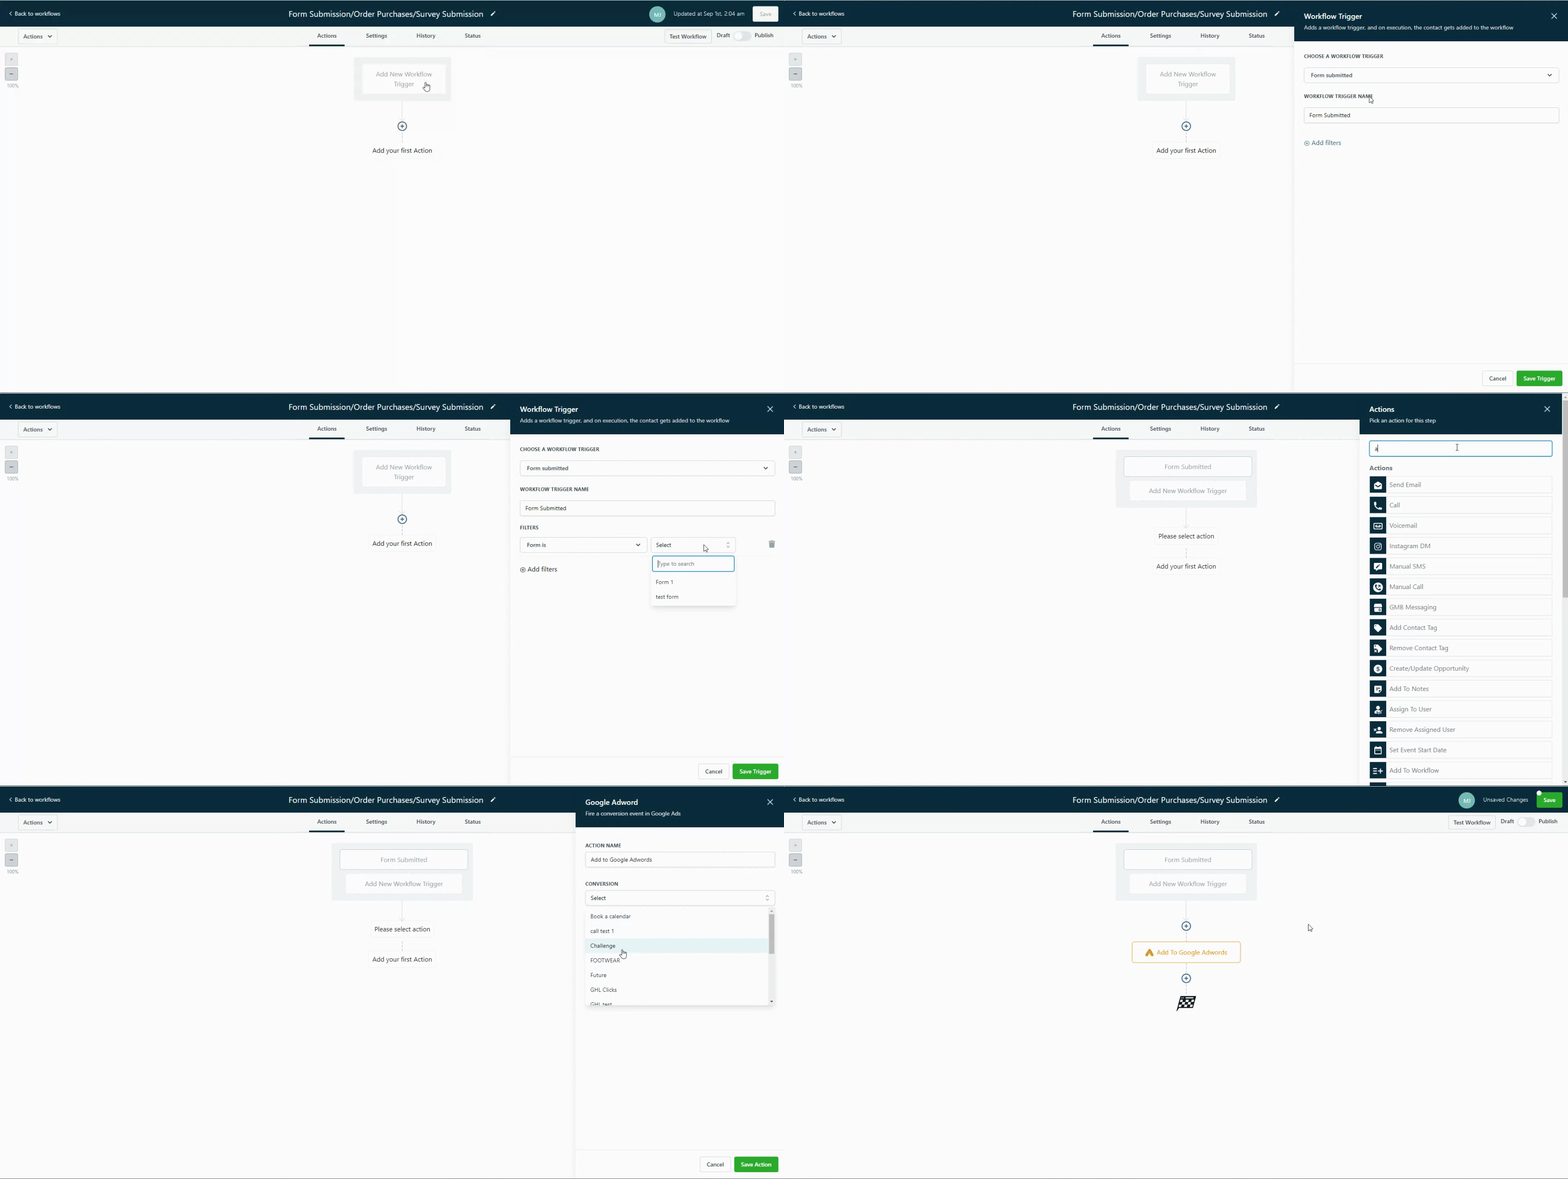
Create the Workflow
Select the trigger - Form Submission, Order Form Submission, or Survey Submission
Once the trigger is selected, add the filters with which the Form/ Order Form/ Survey and save the trigger details
Click on the plus icon action and select the "add to Google Adwords" event and select "Other". Please paste the "Conversion Name" that was created in Google Adwords exactly as it is spelled.
Please click "Save" and "Publish" your workflow
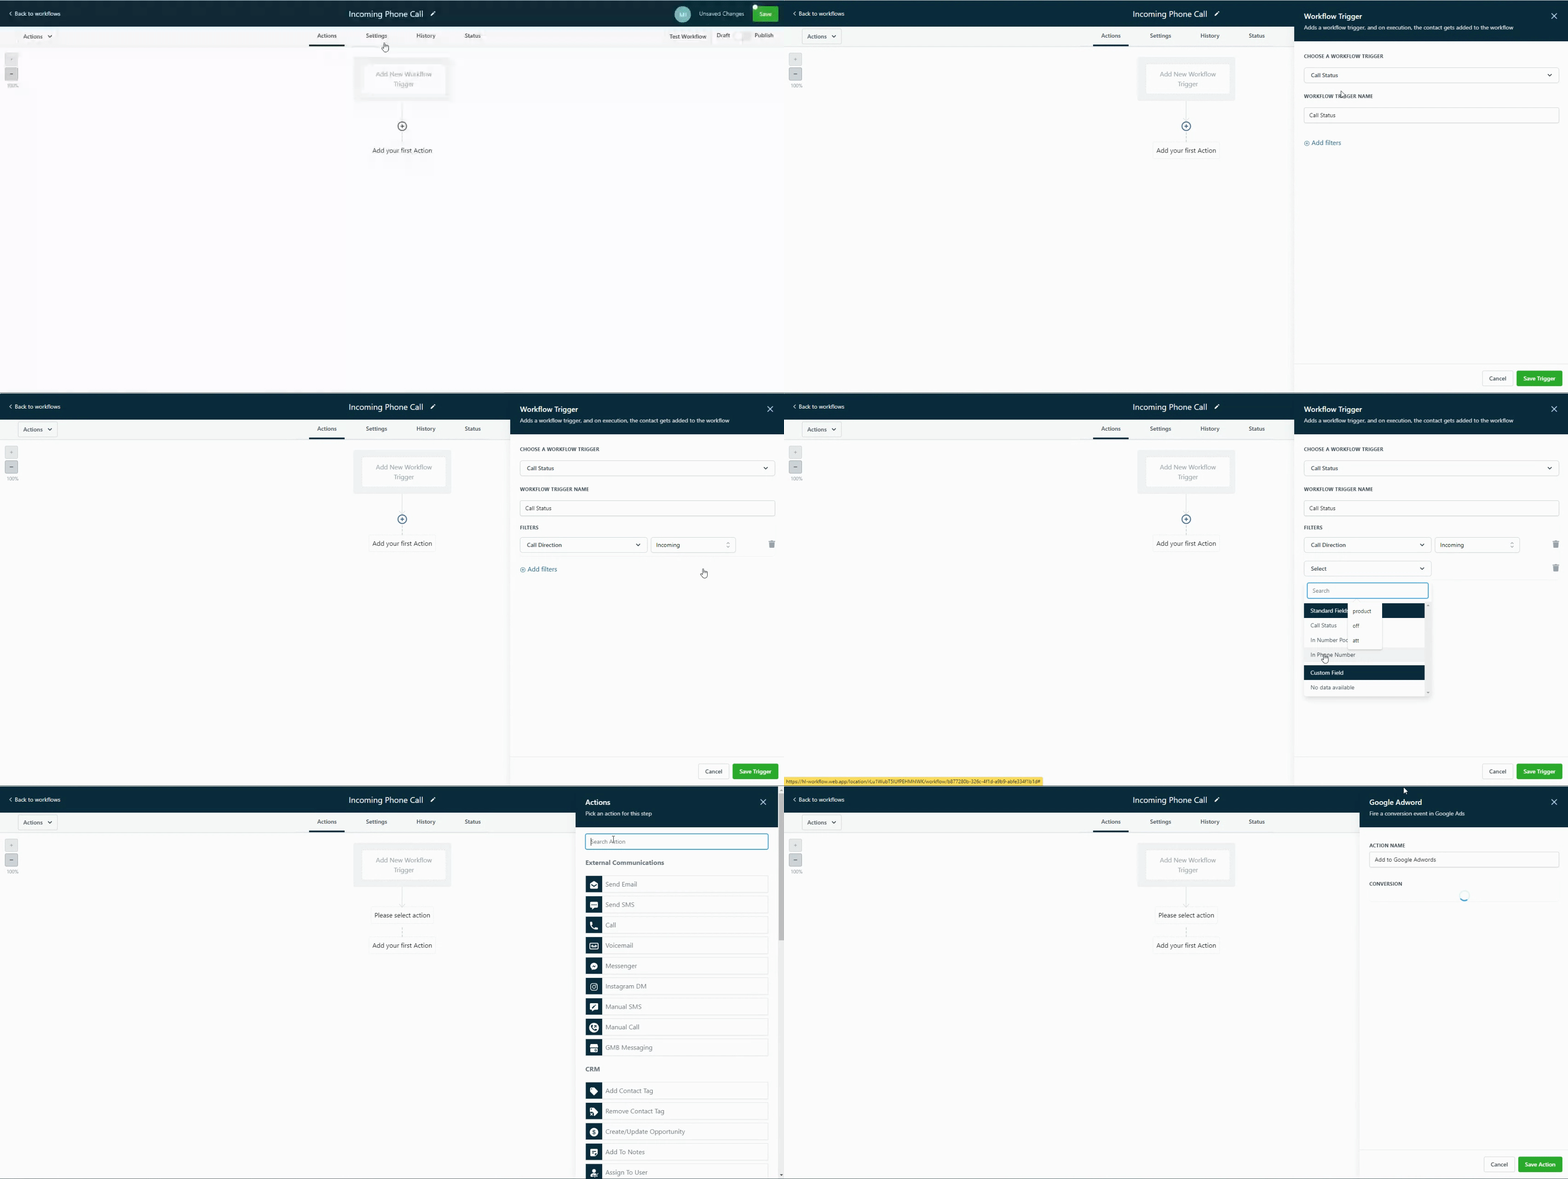
Incoming Phone Call
Create the Workflow
Select the trigger - Call Status
Once the trigger is selected, add the filters with Call Direction > Incoming and Phone Number > Select Phone Number > Save (It is necessary to create separate phone number and pool number action)
Click on the plus icon action and select the "add to Google Adwords" event and select "Other". Please paste the "Conversion Name" that was created in Google Adwords exactly as it is spelled.
Please click "Save" and "Publish" your workflow
Number Pool Calling
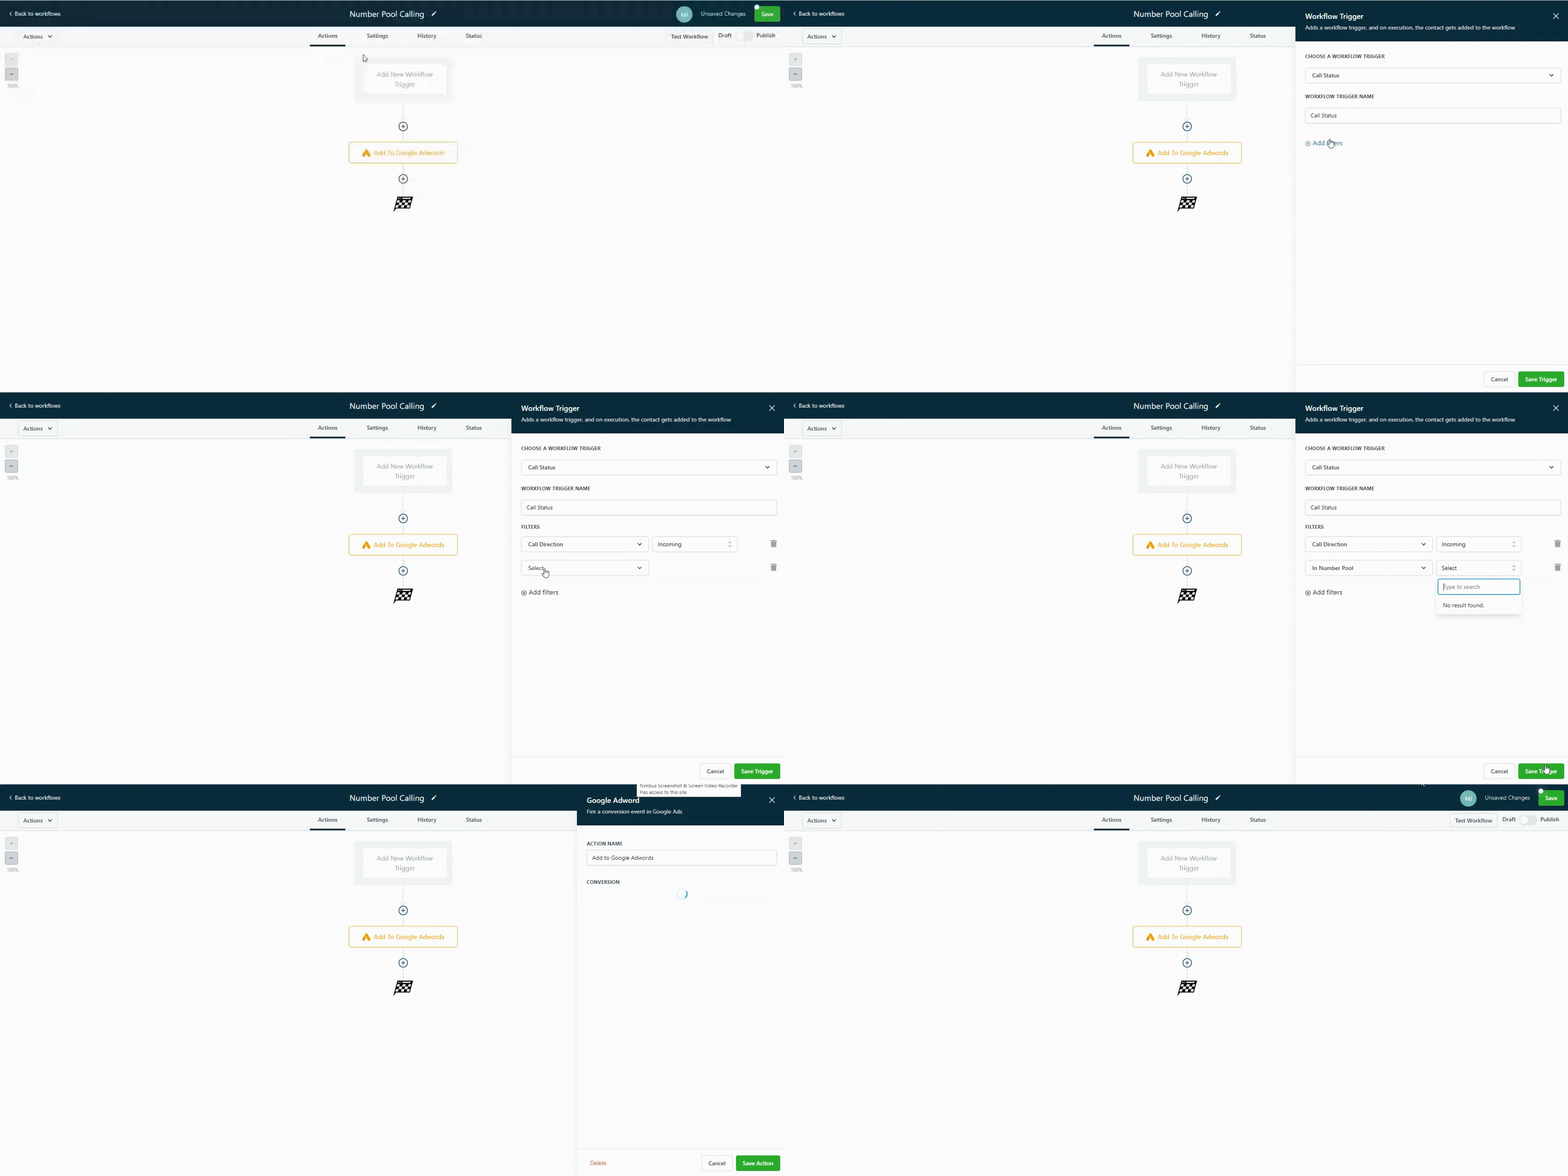
Create the Workflow
Select the trigger - Call Status
Once the trigger is selected, add the filters with Call Direction > Incoming and Pool Number > Select Pool Number.
[Please add the pool number script on the funnel/website in header settings]
Click on the plus icon action and select the "add to Google Adwords" event and select "Other". Please paste the "Conversion Name" that was created in Google Adwords exactly as it is spelled.
Please click "Save" and "Publish" your workflow
Chat Widget
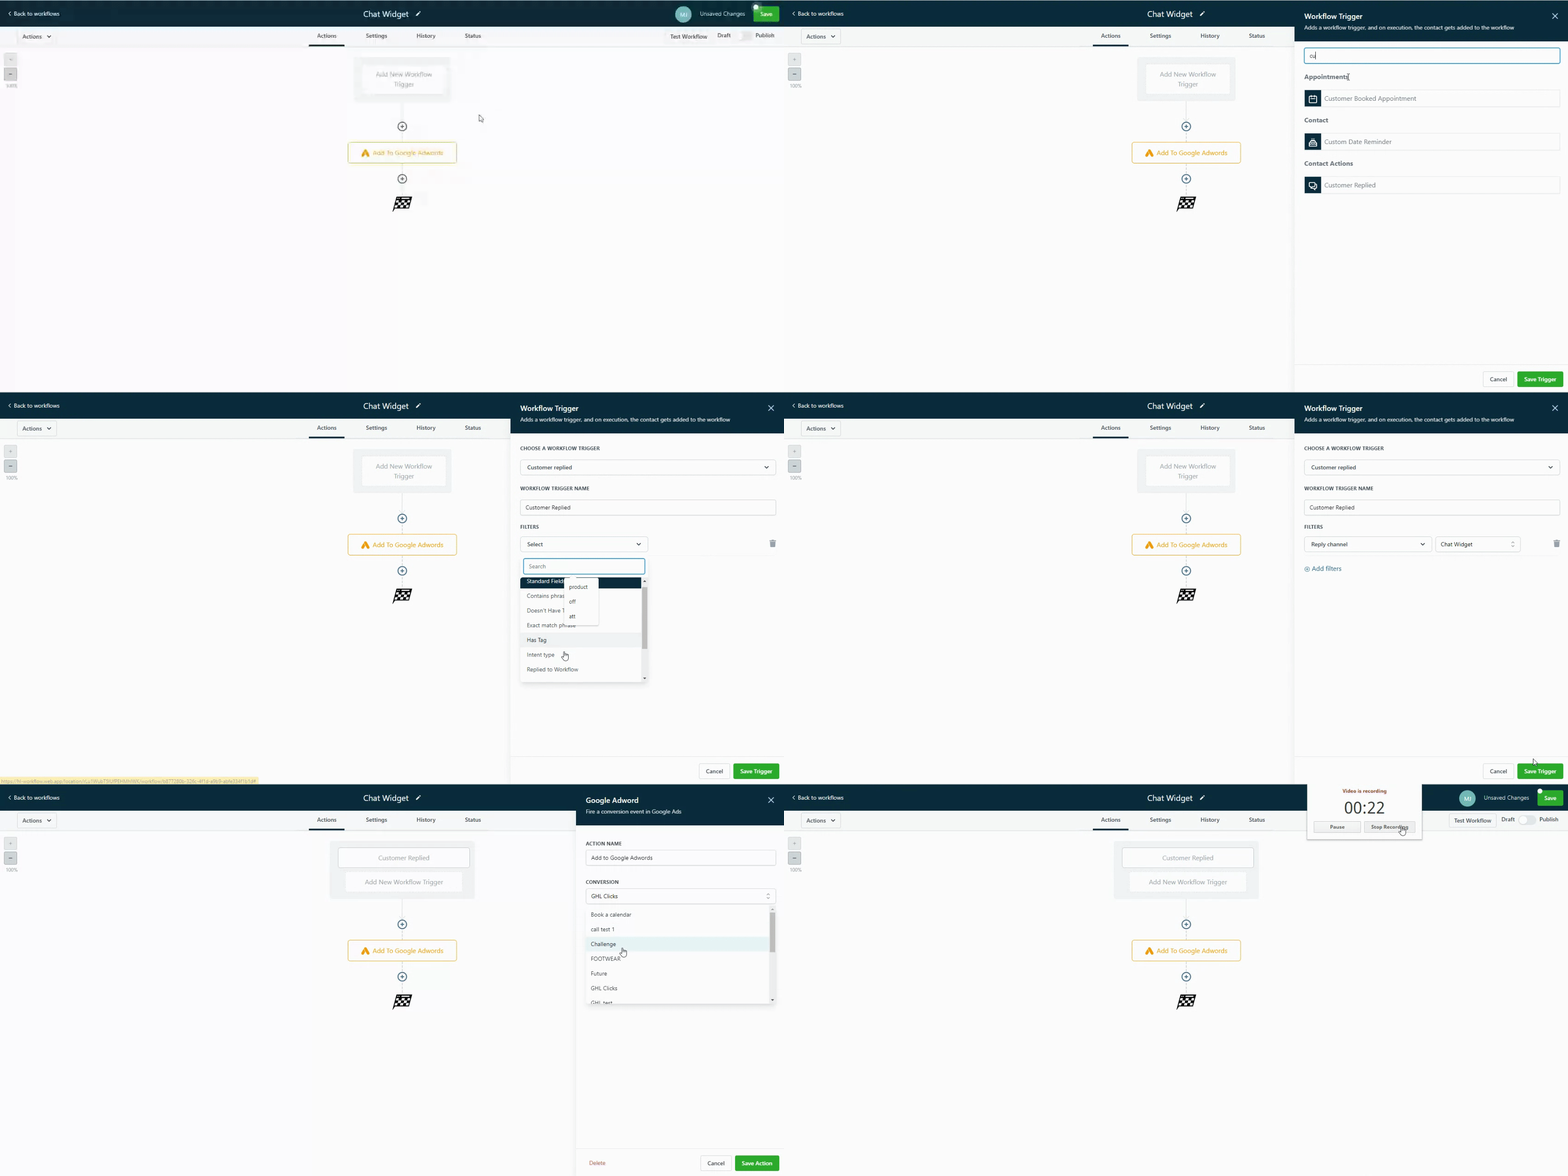
Create the Workflow
Select the trigger - Customer Replied Trigger
Click on the plus icon action and select the "add to Google Adwords" event and select "Other". Please paste the "Conversion Name" that was created in Google Adwords exactly as it is spelled.
Please click "Save" and "Publish" your workflow
Troubleshooting
I have set up my conversions now how do I know it's working?
Currently, there is no way to test this event. You can always check your workflow action and check out the history tab. It should show the execution for Google Adword Action.
Where can I see my conversions?
It will take 24 hours exactly to get the list populated in trigger/workflow as well as in Google Adword Conversion. Within the 24-hour window, you can check the workflow history
Copyright © 2026 TekMatix. All rights reserved | [email protected]

