
TekMatix Help Blog
Search Help Categories
Use the search bar below to look for help articles you need.
How to Create an Email Unsubscribe Page
Welcome to this handy guide on making your own custom email unsubscribe page using our CRM! If you're looking to give your email marketing a little boost by making it easy and smooth for subscribers to say goodbye, you're in the right place. This guide is perfect for both newcomers and those already familiar with our CRM, aiming to improve how they handle unsubscribes.
You'll learn step by step how to create, design, and link an unsubscribe page right into your email campaigns. Ever wondered how to keep things looking professional while making sure your subscribers can easily opt-out? Or how to keep your brand's vibe even on an unsubscribe page? What about making sure that once someone decides to leave, they don't get bothered by more emails? We've got all these topics covered!
We'll start with the basics of what an unsubscribe page is and why it's important. Then, we'll dive into the nitty-gritty of setting one up, from picking the right spot in your CRM to adding all the bits and pieces that make up a good page. We'll also touch on how to link this page to your emails and make sure the whole unsubscribe process is smooth sailing.
Got concerns about making sure everything works as it should? We'll go over some common hiccups and how to fix them. Plus, we'll answer questions like what to do if your unsubscribe page isn't showing up right or how to tweak those “Do Not Disturb” settings.
By the end of this guide, you'll be all set to create an unsubscribe page that keeps things friendly and professional, even when saying goodbye. And remember, a well-done unsubscribe page can leave a good last impression, which is always a plus in email marketing. If you hit a snag or have more questions, our support team is here to help. Let's get started!
Introduction to Email Unsubscribe Pages
An email unsubscribe page is a landing page where subscribers are directed when they choose to opt-out of receiving further emails from you. A well-designed unsubscribe page can help maintain a positive relationship with your subscribers, even as they leave your mailing list. This guide will walk you through the process of creating such a page within our CRM.
Step-by-Step Guide
Accessing the Right Account
Ensure you're logged into your CRM account.
Navigate to the sub-account where you wish to create the unsubscribe page.
Creating the Unsubscribe Page
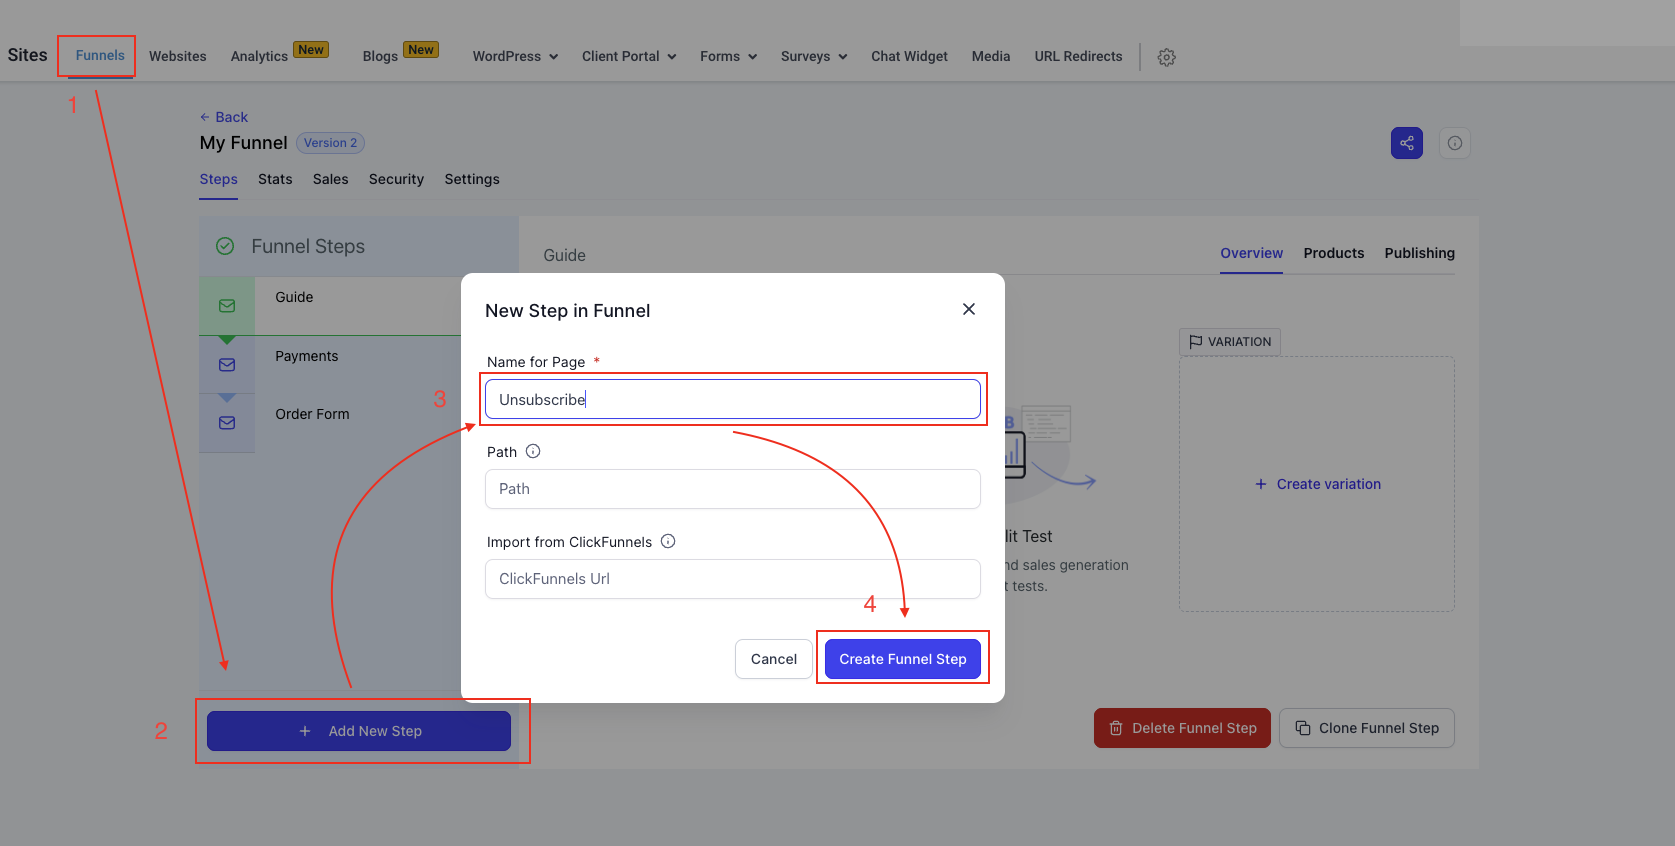
Go to the "Sites" section from the dashboard.
Choose between creating a new website or editing an existing one. For funnels, select "Funnels" and edit or add a new step.
Add a new page, naming it appropriately, e.g., "Unsubscribe Page".
Designing the Page
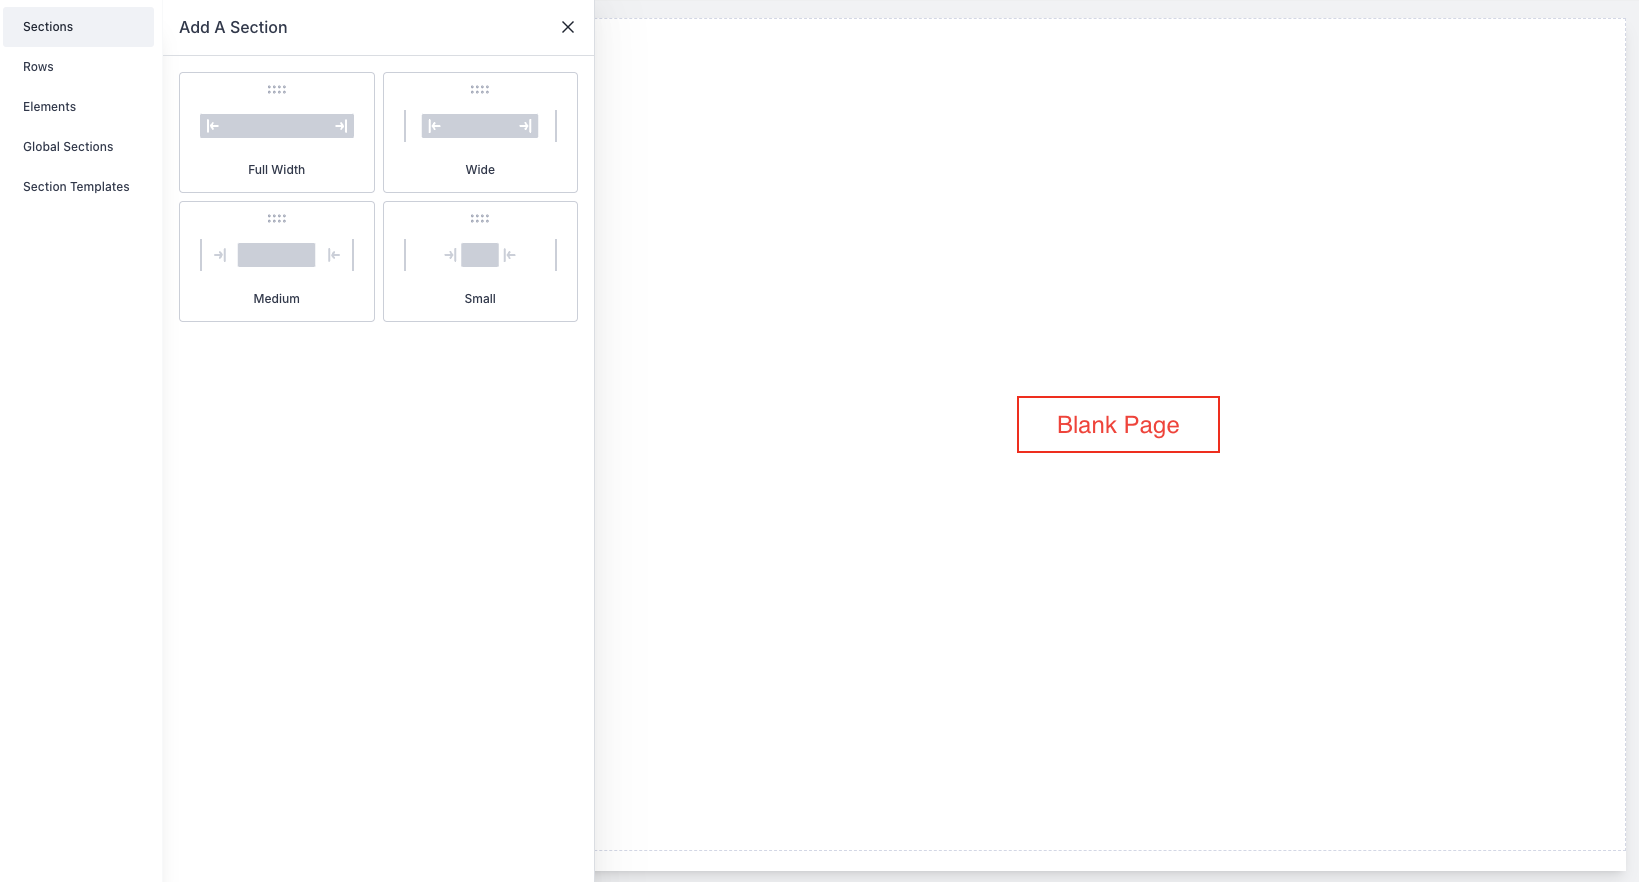
Start with a blank page for full customization.
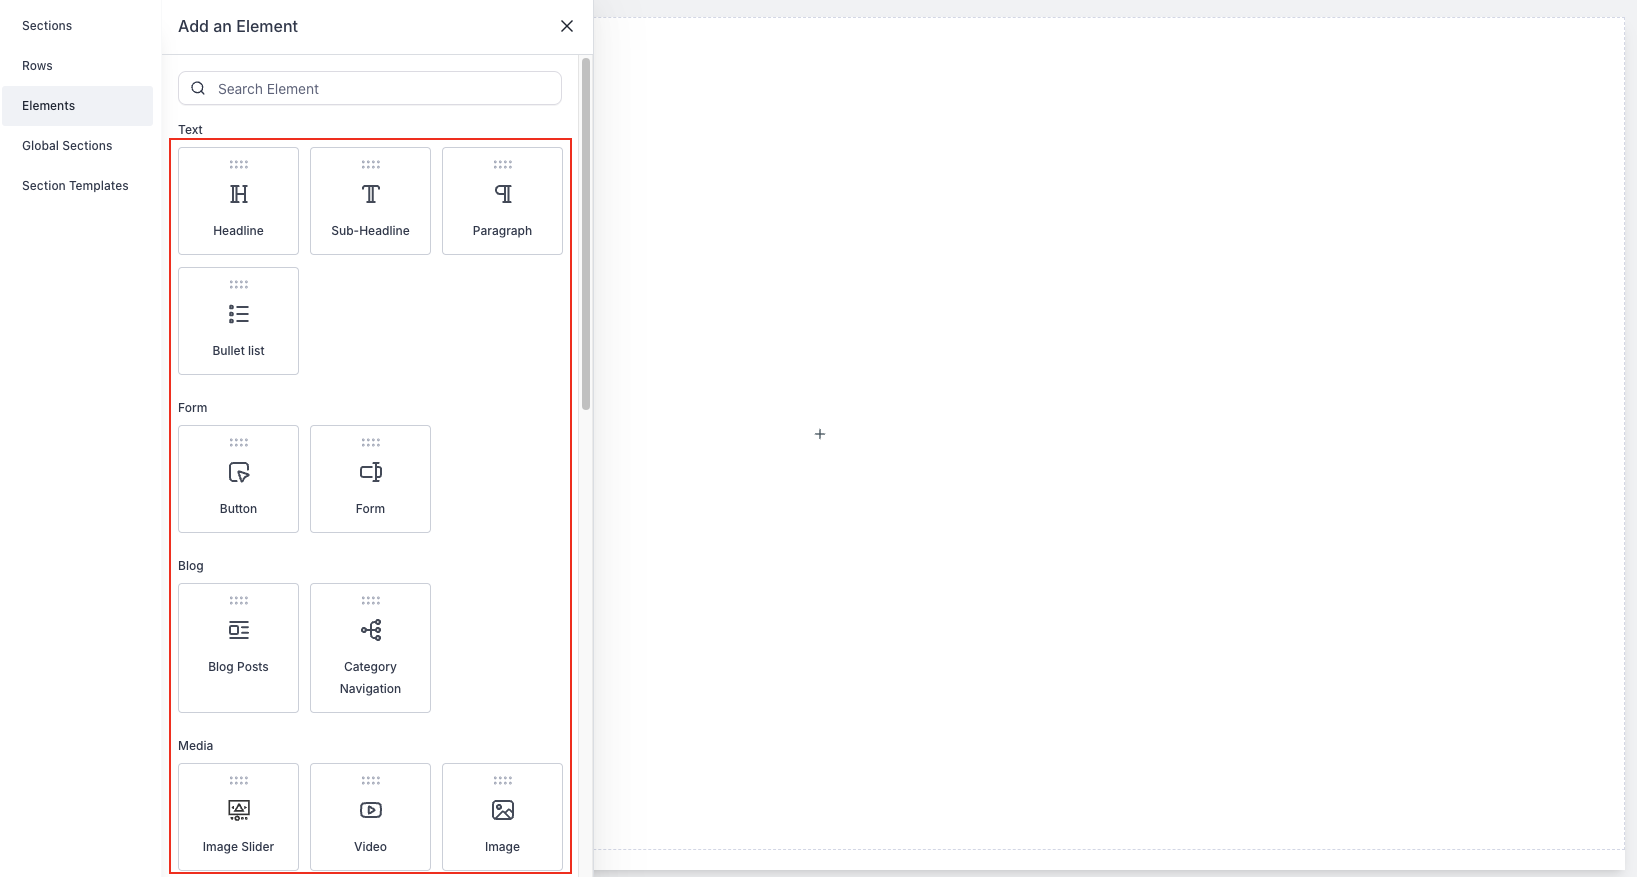
Add elements such as a headline, sub-headline, and an image or GIF to convey the unsubscribe message. For example, your headline could be "You're Unsubscribed," followed by a sub-headline, “You will no longer receive emails from us, sad to see you go.”
Customize the page's appearance, including colors and images, to align with your brand.
Setting Up the Unsubscribe Link
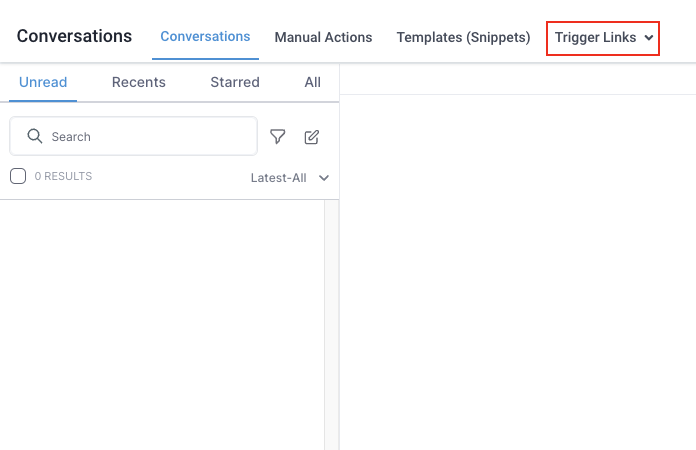
Navigate to the "Conversations" tab and select "Trigger Links."
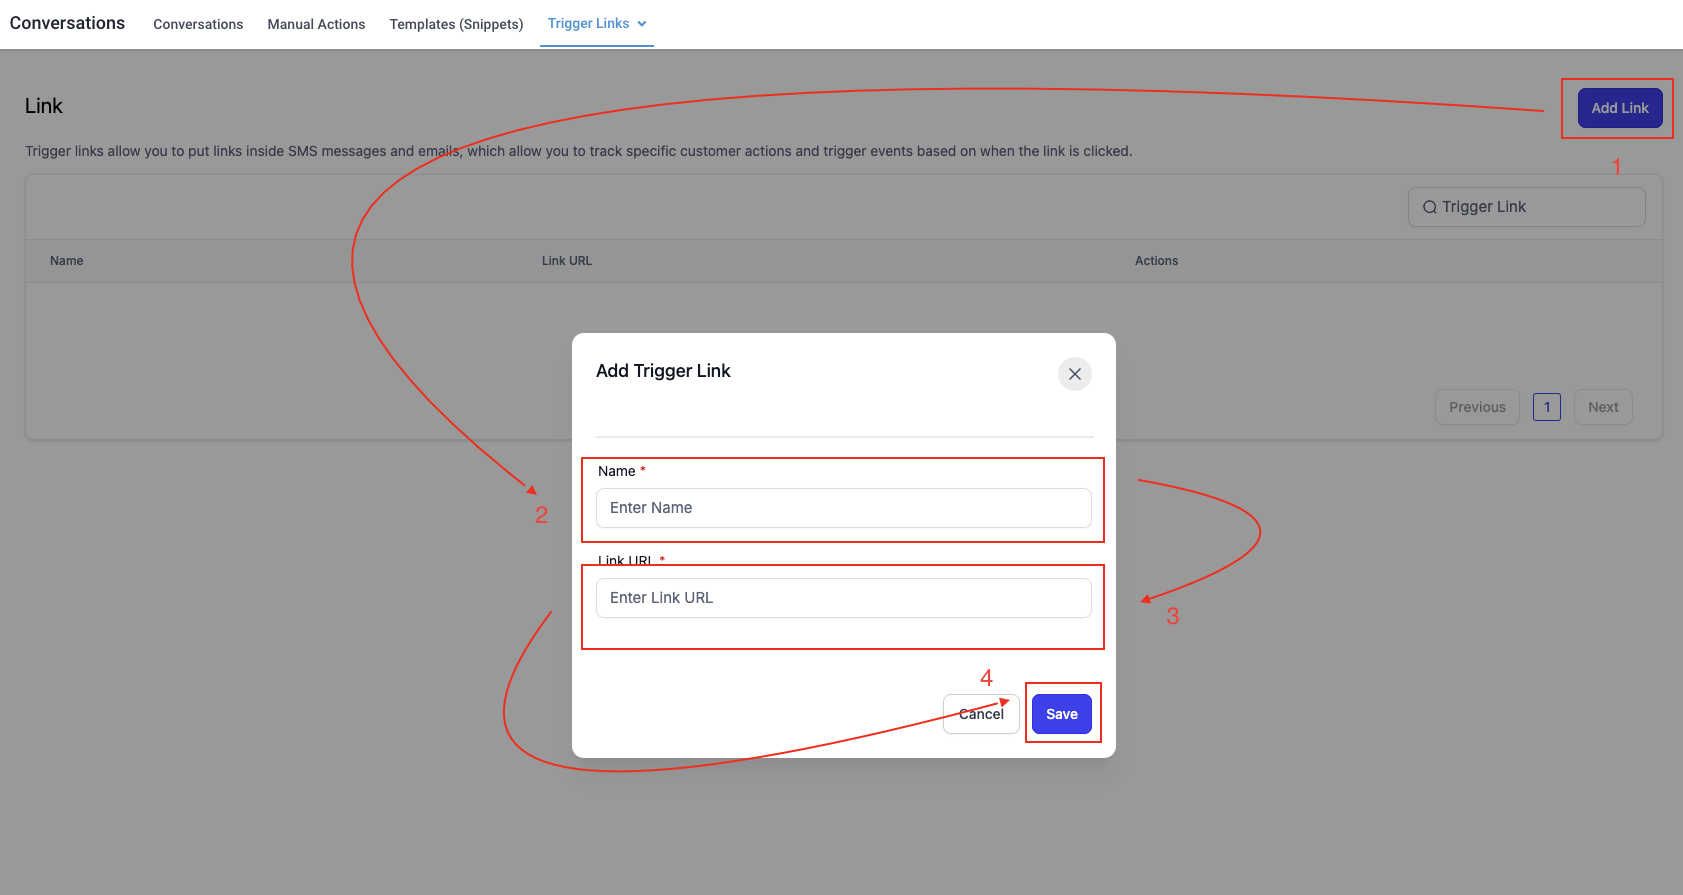
Create a new link named "Unsubscribe Link" and input the URL of your unsubscribe page.
Save the link to use in your email templates.
Automating the Unsubscribe Process
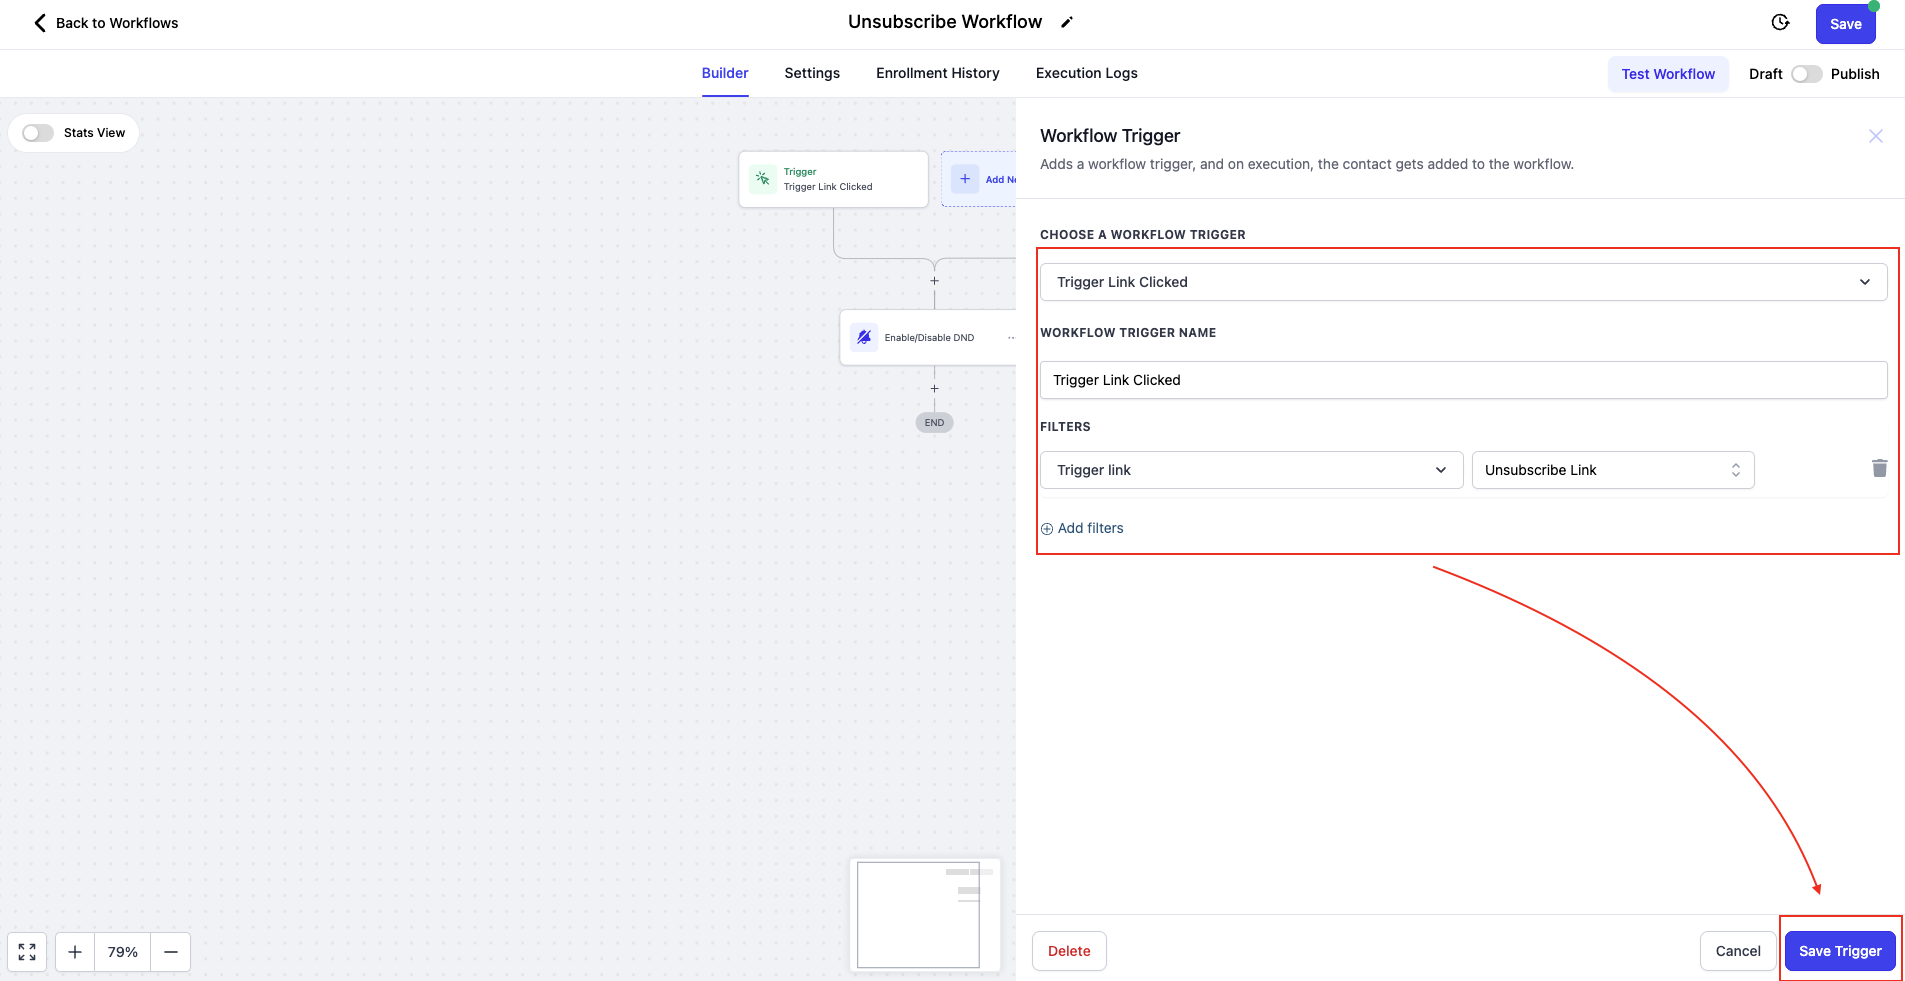
Go to the "Automation" section and create a new workflow named "Unsubscribe Workflow."

Set the trigger as "Trigger Link Clicked" and select your unsubscribe link.
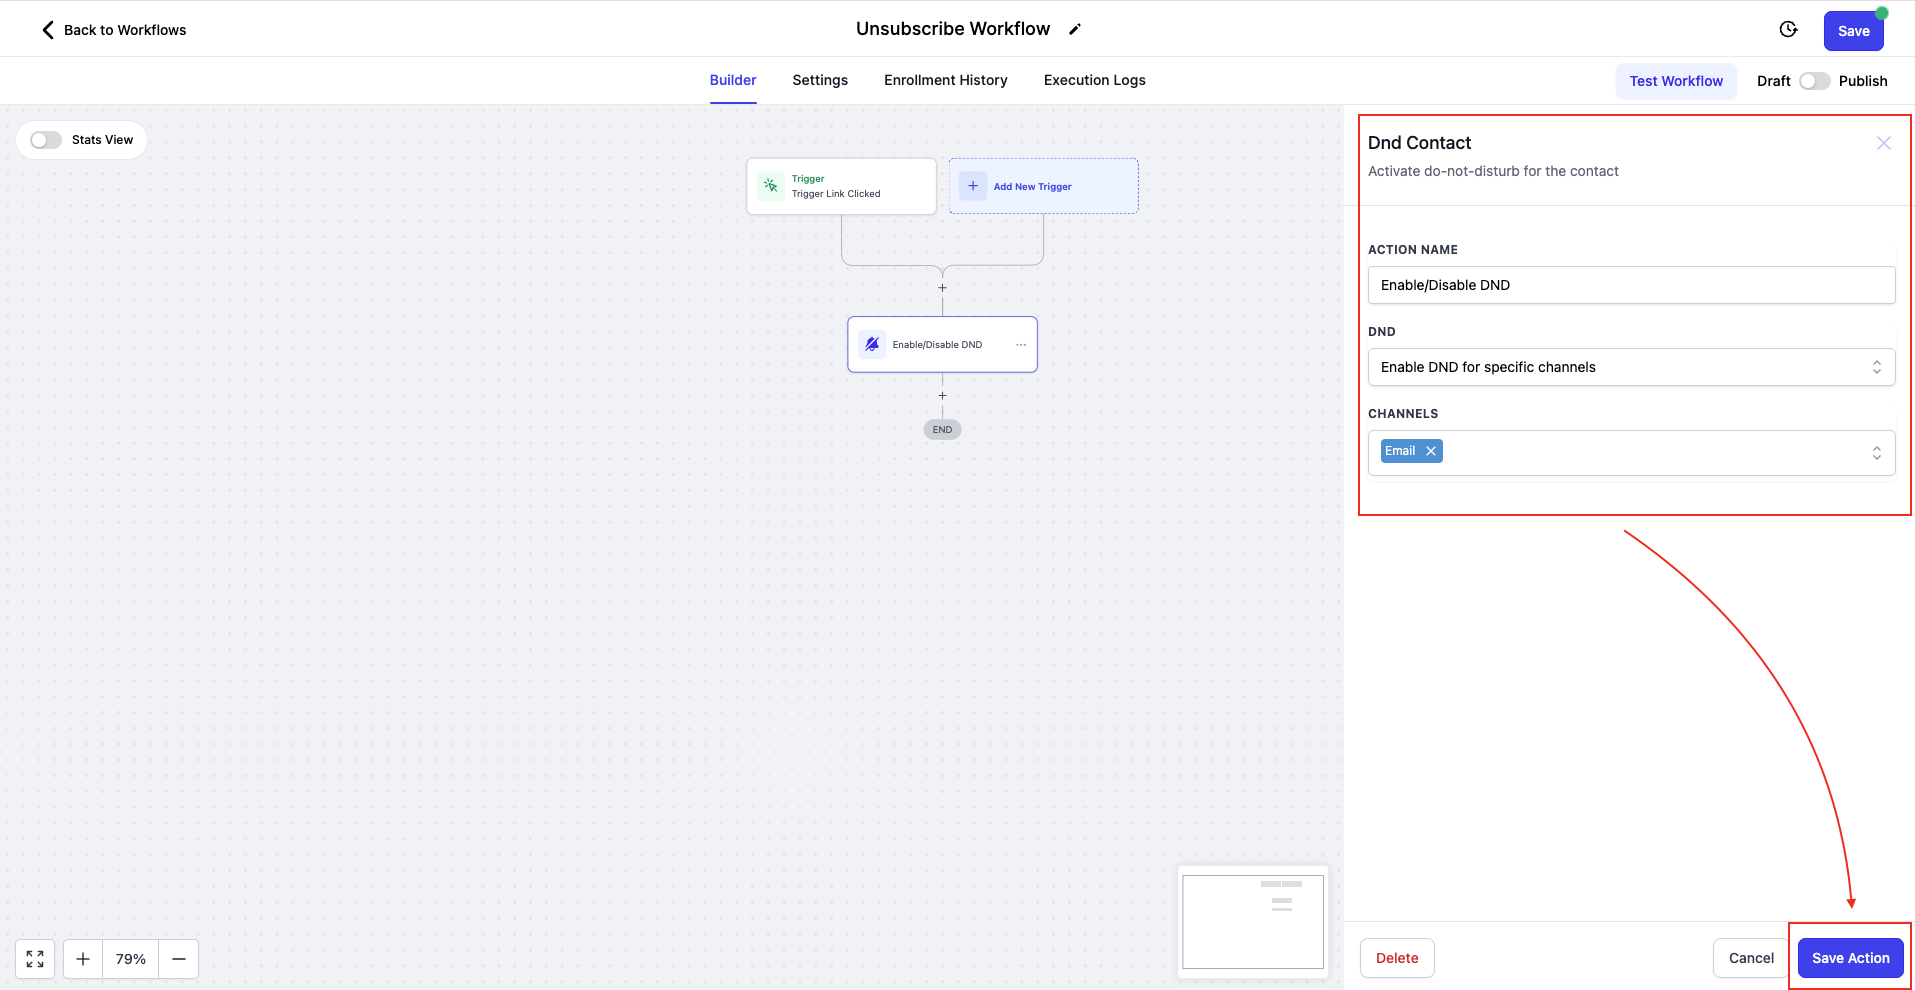
Add an action to enable "Do Not Disturb" (DND) for all channels, ensuring the subscriber won't receive further communications.
Integrating with Email Templates
In the "Marketing" section, access your email templates.
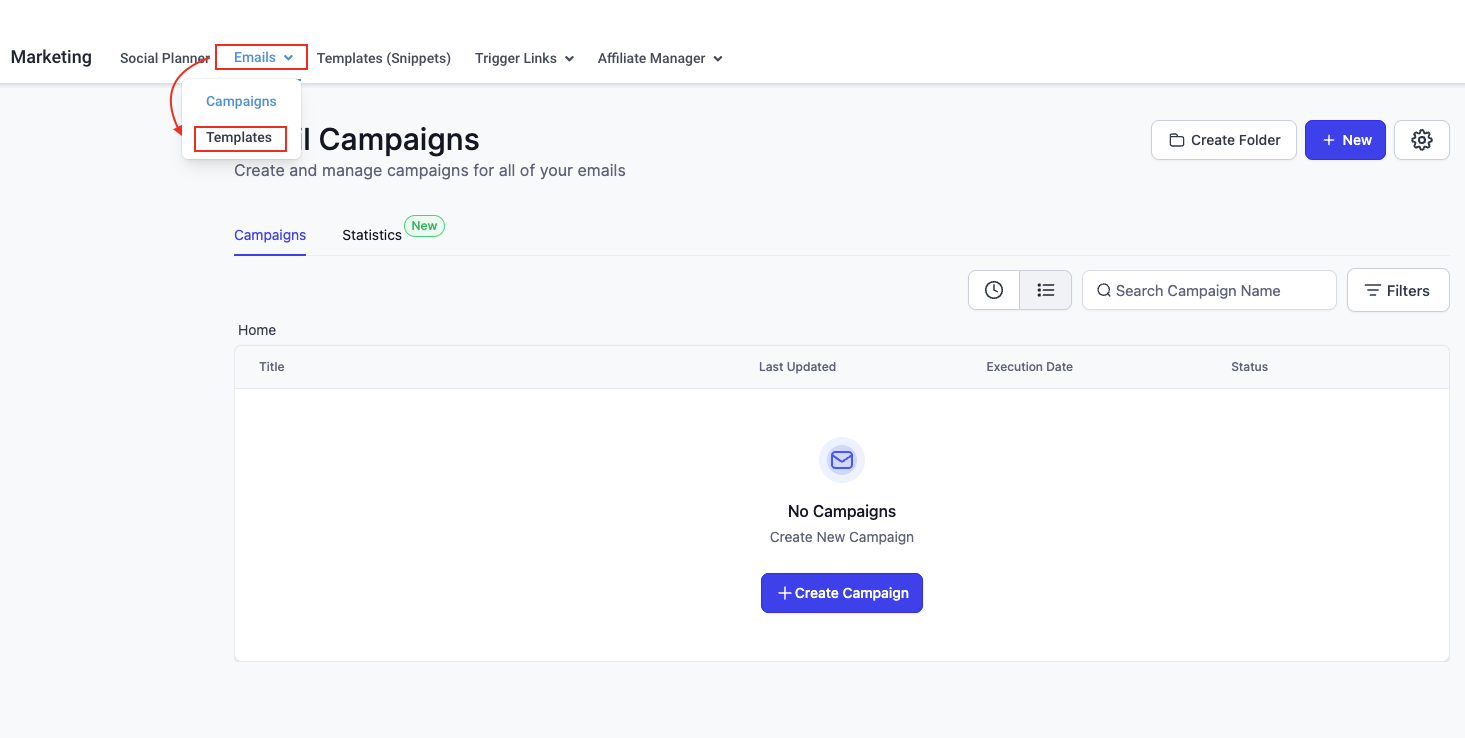
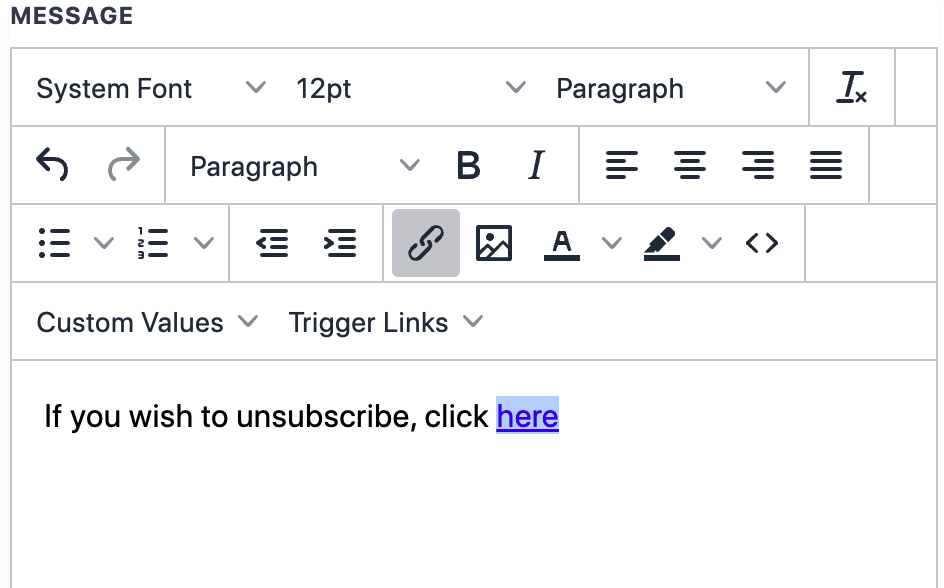
Edit the template to include the unsubscribe link at the bottom, ensuring it's clearly visible and accessible.
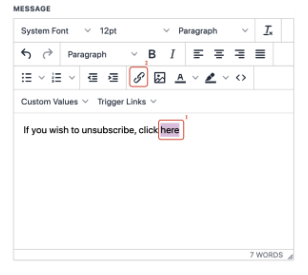
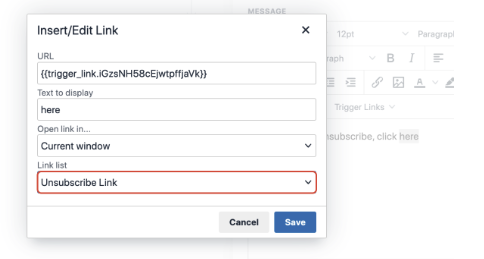
Now anyone who click on the trigger link here will be marked DND for the email channel!
Troubleshooting and FAQs
What if my unsubscribe page doesn't show up correctly?Check the page URL and ensure it's correctly linked in the trigger link settings.
Check the page URL and ensure it's correctly linked in the trigger link settings.
Can I customize the DND settings?Yes, you can specify which channels to apply DND to, though it's recommended to enable it for all to comply with unsubscribe requests fully.
Yes, you can specify which channels to apply DND to, though it's recommended to enable it for all to comply with unsubscribe requests fully.
Conclusion
Thanks for checking out our guide on making your own email unsubscribe page in our CRM! We walked you through each step, from logging into your account to customizing and setting up your unsubscribe page. You learned how to design a page that matches your brand and how to make sure people can easily opt-out of emails if they choose. We also covered how to link this page in your emails and set up an automatic process to stop sending messages to those who unsubscribe. Plus, we answered some common questions in case you run into trouble.
Remember, having a nice unsubscribe page is important because it keeps things friendly between you and your subscribers, even if they decide to leave. If you need more help or have questions, our support team is here for you. Thanks for reading, and good luck with your email campaigns!
