
TekMatix Help Blog
Search Help Categories
Use the search bar below to look for help articles you need.

How To Create and Schedule Blog Posts More Easily with Tekmatix’s New Blog Editor Flow
How To Create and Schedule Blog Posts More Easily with Tekmatix’s New Blog Editor Flow
Creating blog content just got faster and more flexible in Tekmatix. With our improved blog post creation flow, you no longer need to fill in SEO metadata before writing. This allows you to focus on your content first—and handle the SEO details later, with a clean preview of your meta tags before publishing.
Why This Matters
Previously, users were required to enter the title, meta description, and image before even starting their blog post. This could disrupt the creative process. With the new flow, you can now:
Start writing first, worry about SEO later.
See a live preview of your SEO metadata before publishing.
Enjoy a cleaner, more intuitive UI in the publishing screen.
Step-by-Step: How to Create a Blog Post in Tekmatix
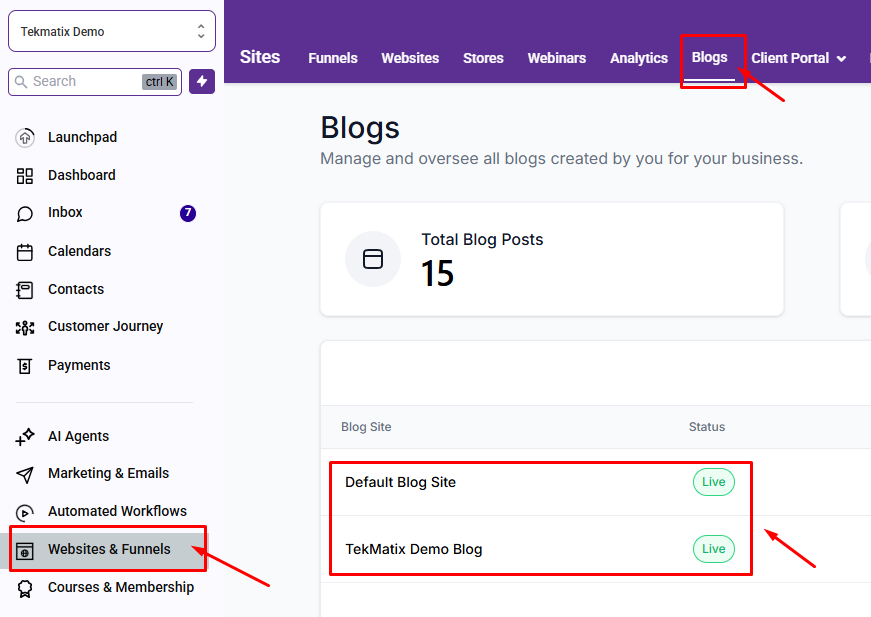
Step 1: Access Your Blog
Navigate to Websites & Funnels > Blogs from your Tekmatix dashboard.
Click on the name of the blog where you want to add a new post.
Step 2: Start a New Blog Post
Click Create New Post.
You’ll be taken directly to the blog post editor, where you can start writing your content immediately—no need to fill in SEO metadata first.

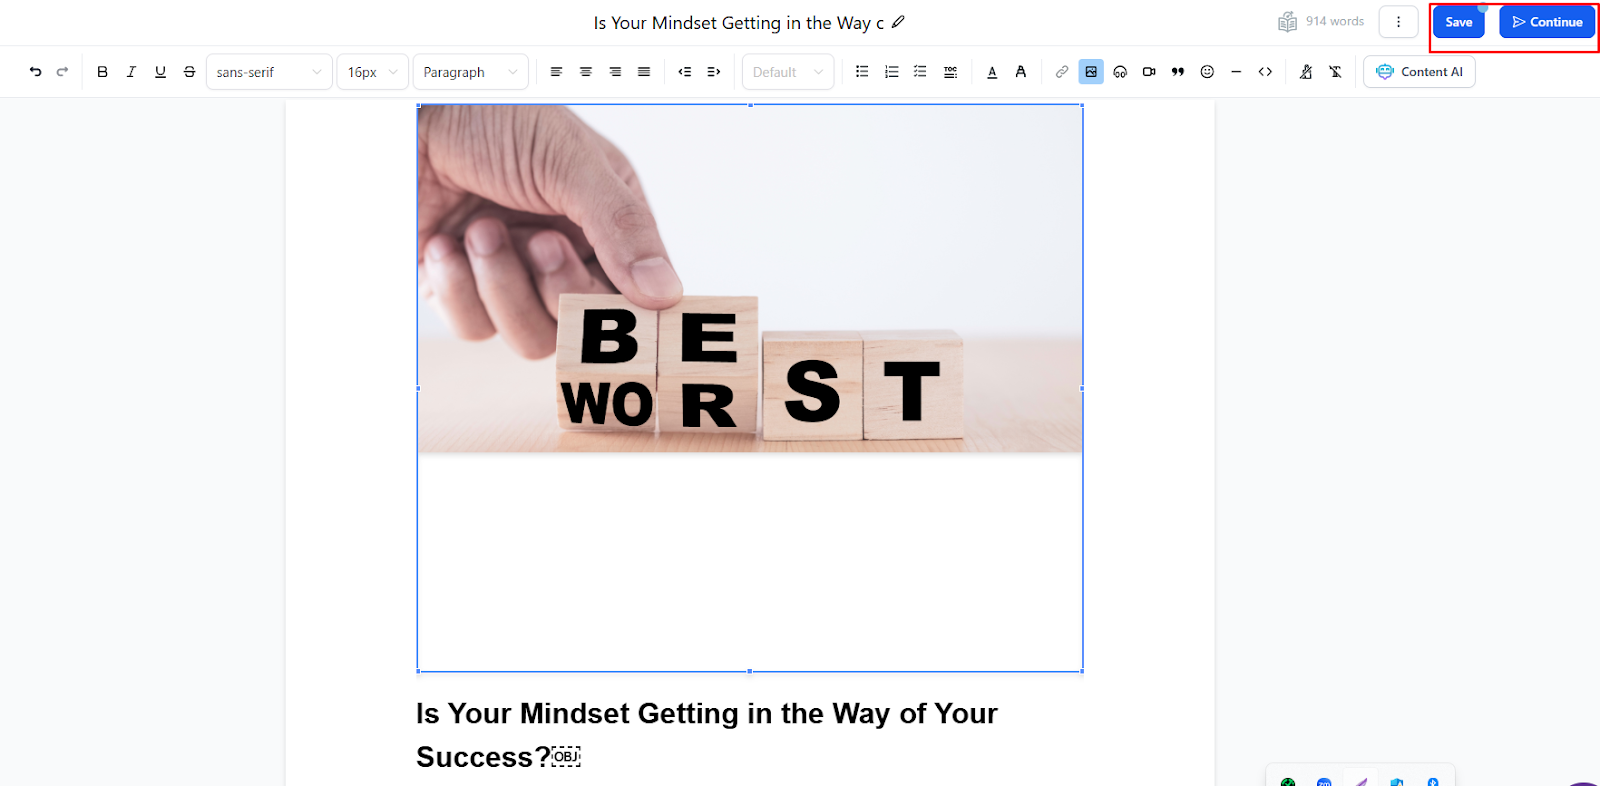
Step 3: Write Your Content
Add your blog body content, format text, insert media, and save your draft as needed.
Step 4: Add SEO Metadata Before Publishing
When you're ready to publish or schedule:
Click Save or Continue at the top right.
On this screen, you'll now see a dedicated section for SEO metadata, including:
Blog Post Title
Meta Post Description
Cover Image
Alt Text (optional)
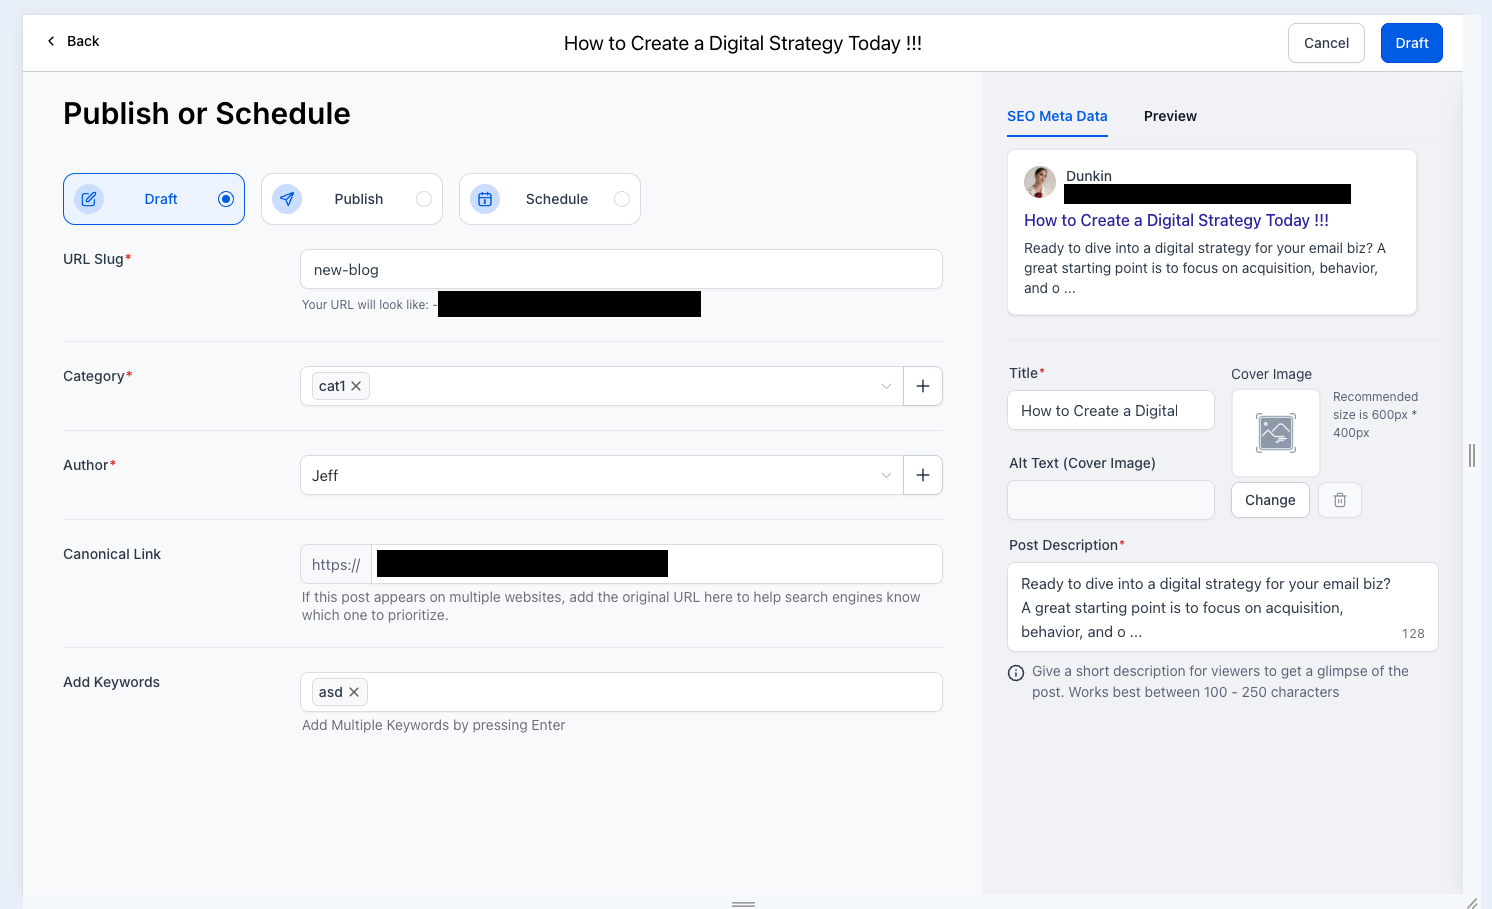
Step 5: Finalize or Save as Draft
You’ll also notice that the “Move to Draft” option is now available under the three dots menu (⋯) on the publishing screen.

Once everything looks good, click Publish or Schedule for a future date.
Sample Scenario: Blogging for a Product Launch
Case: You're launching a new feature in Tekmatix and want to write a blog post about it.
Go to Sites > Blogs and select your blog.
Click Create New Post and start writing your article with screenshots and explanations.
Once you’re happy with the content, proceed to the Schedule/Publish screen.
Add an SEO-optimized title like: “How Tekmatix’s New Feature Helps You Save Time on Campaign Setup”
Enter a meta description and upload a relevant featured image.
Preview how the post will look on social media, then click Schedule to post it tomorrow.
Pro Tips
You can always edit your SEO details later before publishing.
Use relevant keywords in your title and meta description for better search visibility.
The new flow helps you focus on content first, especially useful during brainstorming or rapid publishing sprints.
Final Thoughts
This update is part of Tekmatix's ongoing improvements to make your content creation process more intuitive and less restrictive. Whether you're blogging for marketing, SEO, or community updates, the enhanced flow gives you full control—when you need it.
