
TekMatix Blog & Help Articles
Use the search bar below to look for help articles you need.

How to Connect Jira with Tekmatix Workflows
Managing customer requests, development tasks and internal operations just became much easier.
Tekmatix now includes a native Jira integration inside the Workflow Builder, allowing your automations to respond to activity in Jira and send information back into Jira without relying on manual updates or disconnected systems.
You can now trigger Tekmatix workflows when Jira issues are created or updated, then use workflow actions to create issues, update records, add comments, upload attachments, log work, manage watchers, link related issues and move work into a sprint.
This creates a much smoother connection between your customer-facing systems and the tools your technical, product or support teams already use every day.
What Is Included in the Jira Integration?
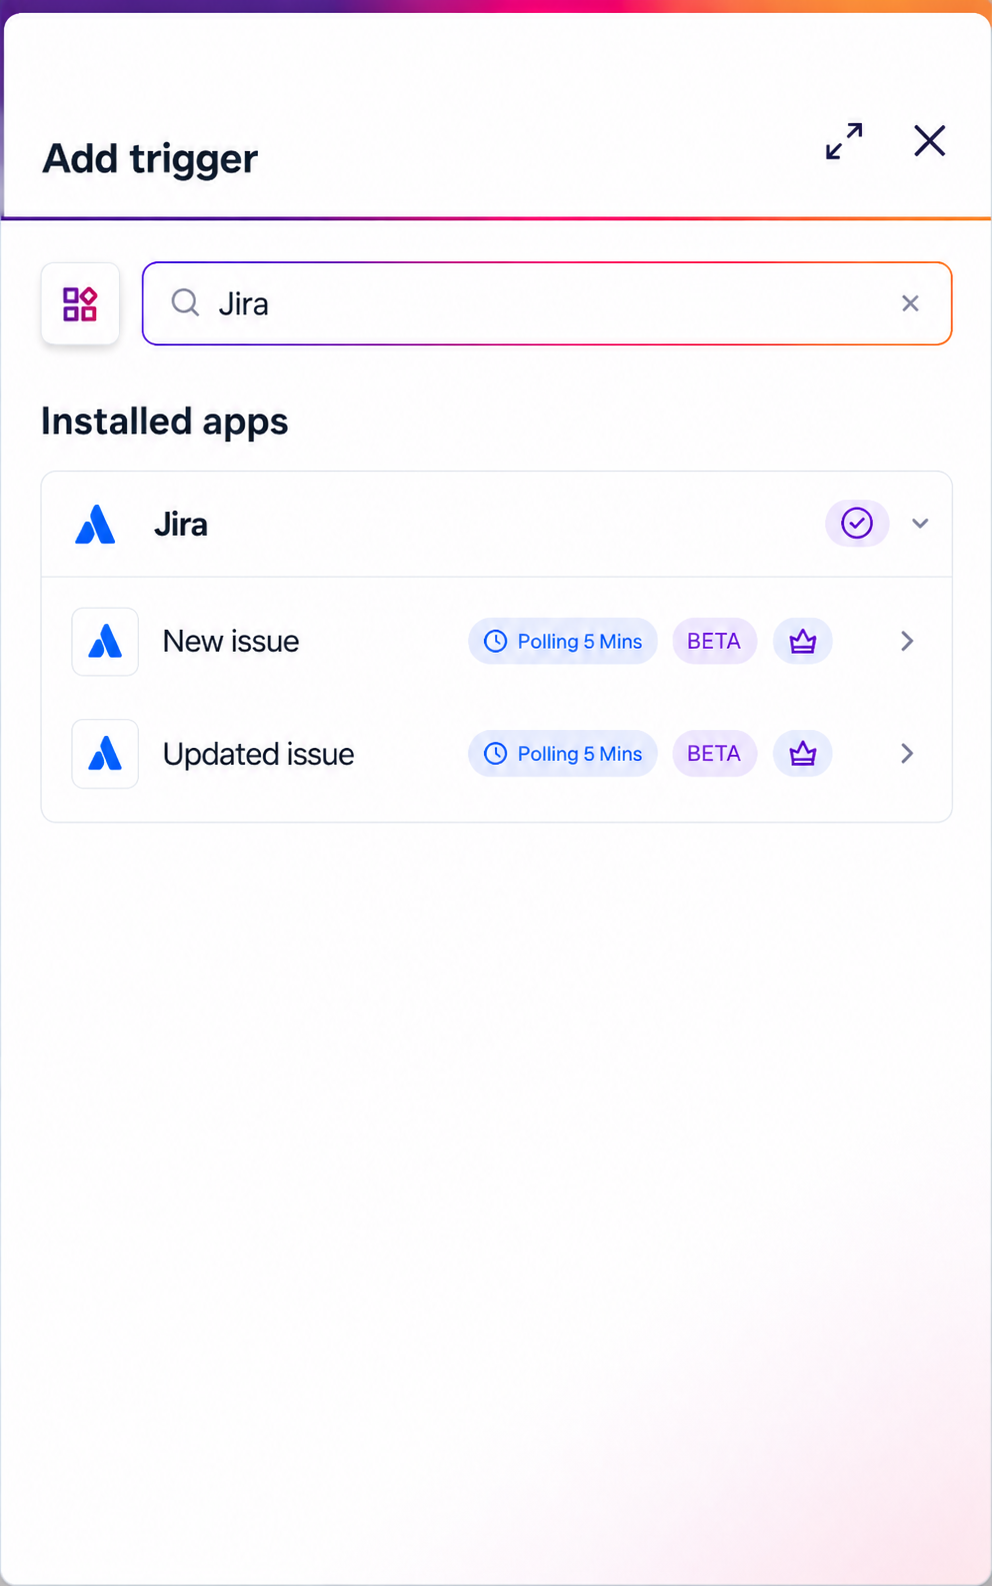
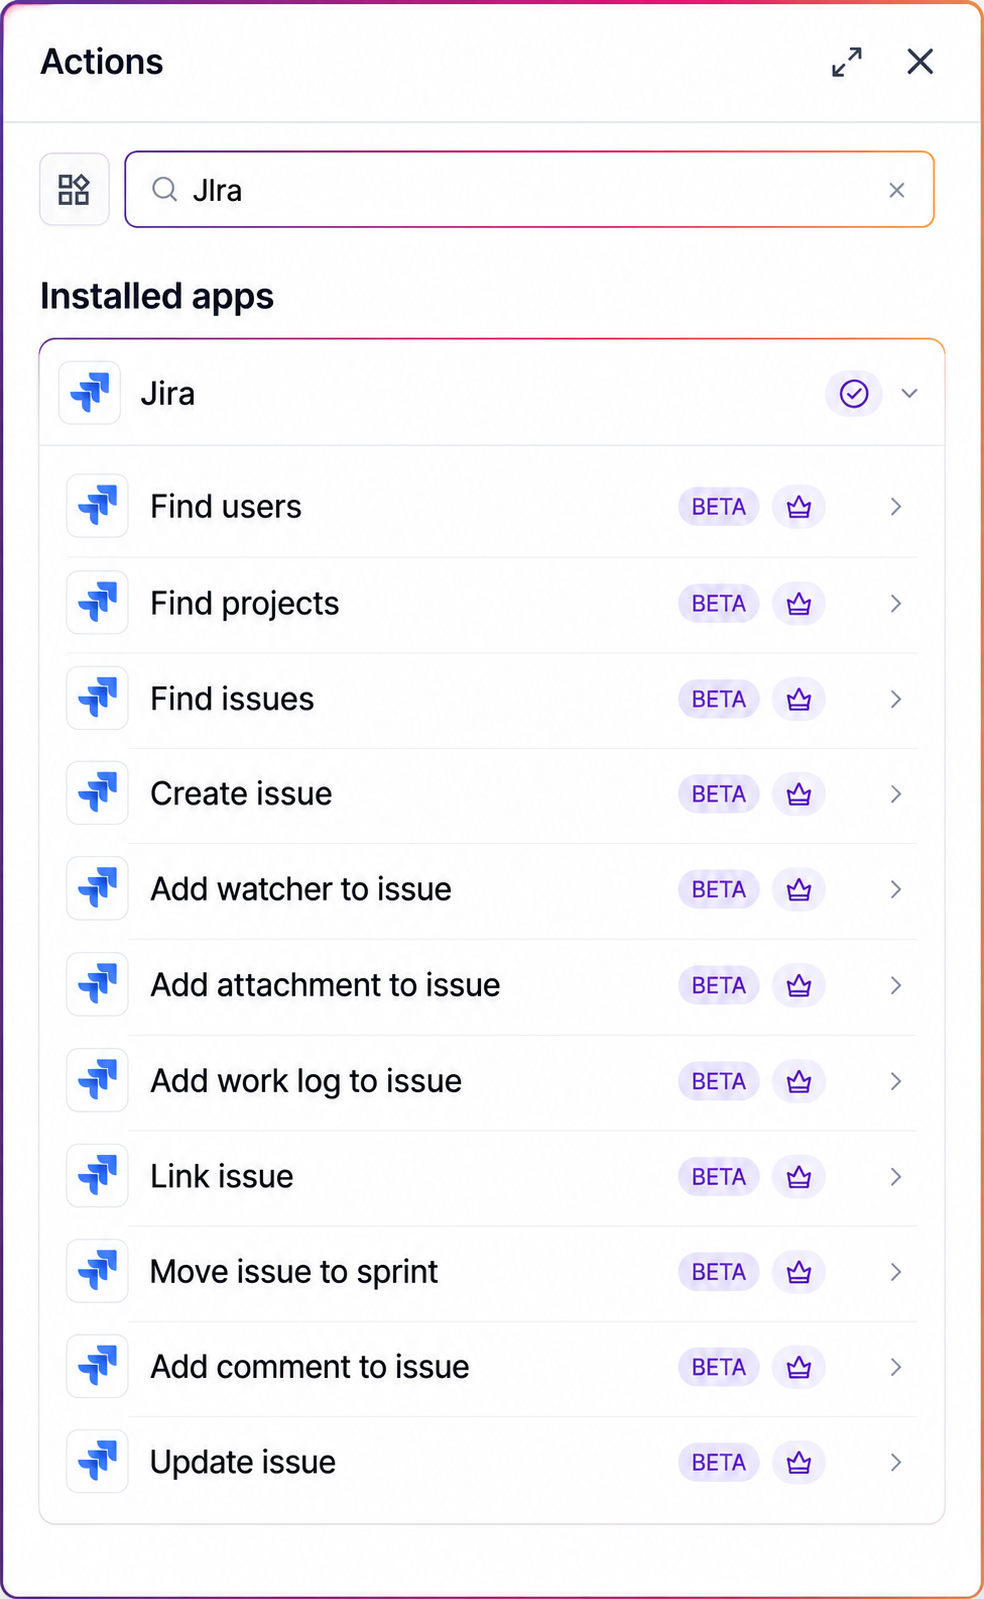
The Jira integration includes two workflow triggers and eleven workflow actions.
These tools support a wide range of issue-management and project-management workflows, from notifying customers when a technical issue has been resolved to automatically creating Jira issues when someone submits a support request.
The integration uses OAuth authentication for a secure connection to your Atlassian account.
When connecting Jira, you can also add a recognisable name and email address to help your team identify which Jira account has been connected.
Each Jira trigger and action includes a Cloud Site selector. This is particularly helpful when one Atlassian account has access to multiple Jira Cloud sites, because you can choose exactly which site each workflow step should use.
Jira Workflow Triggers
Jira triggers allow activity inside Jira to start a Tekmatix workflow.
The available triggers are:
New Issue
This trigger starts a workflow when a new issue is created in Jira.
For example, you could notify a support manager, update a contact record, create an internal task or send a confirmation message when a new Jira issue is logged.
Updated Issue
This trigger starts a workflow when an existing Jira issue is updated.
You could use this to respond to changes in:
Issue status
Assignee
Priority
Description
Resolution
Sprint
Other issue fields
This makes it possible to automatically communicate important updates to customers, internal team members or other systems connected to Tekmatix.
Jira Workflow Actions
Jira actions allow a Tekmatix workflow to create, update or manage information inside Jira.
Discovery Actions
Discovery actions help your workflow locate the correct Jira record before another action is performed.
Find Users
Search for a Jira user so they can be assigned to an issue, added as a watcher or referenced in another workflow step.
Find Projects
Find a Jira project and retrieve the correct project information for later workflow actions.
Find Issues
Search for existing Jira issues using information collected earlier in the workflow.
This can be particularly useful when checking whether a similar issue already exists or when matching an incoming support request to an existing Jira record.
Issue Creation and Update Actions
Create Issue
Create a new Jira issue automatically from a Tekmatix workflow.
You could create an issue when:
A support form is submitted
A customer reports a bug
A team member submits an internal request
A sales opportunity requires technical input
A customer onboarding task needs development support
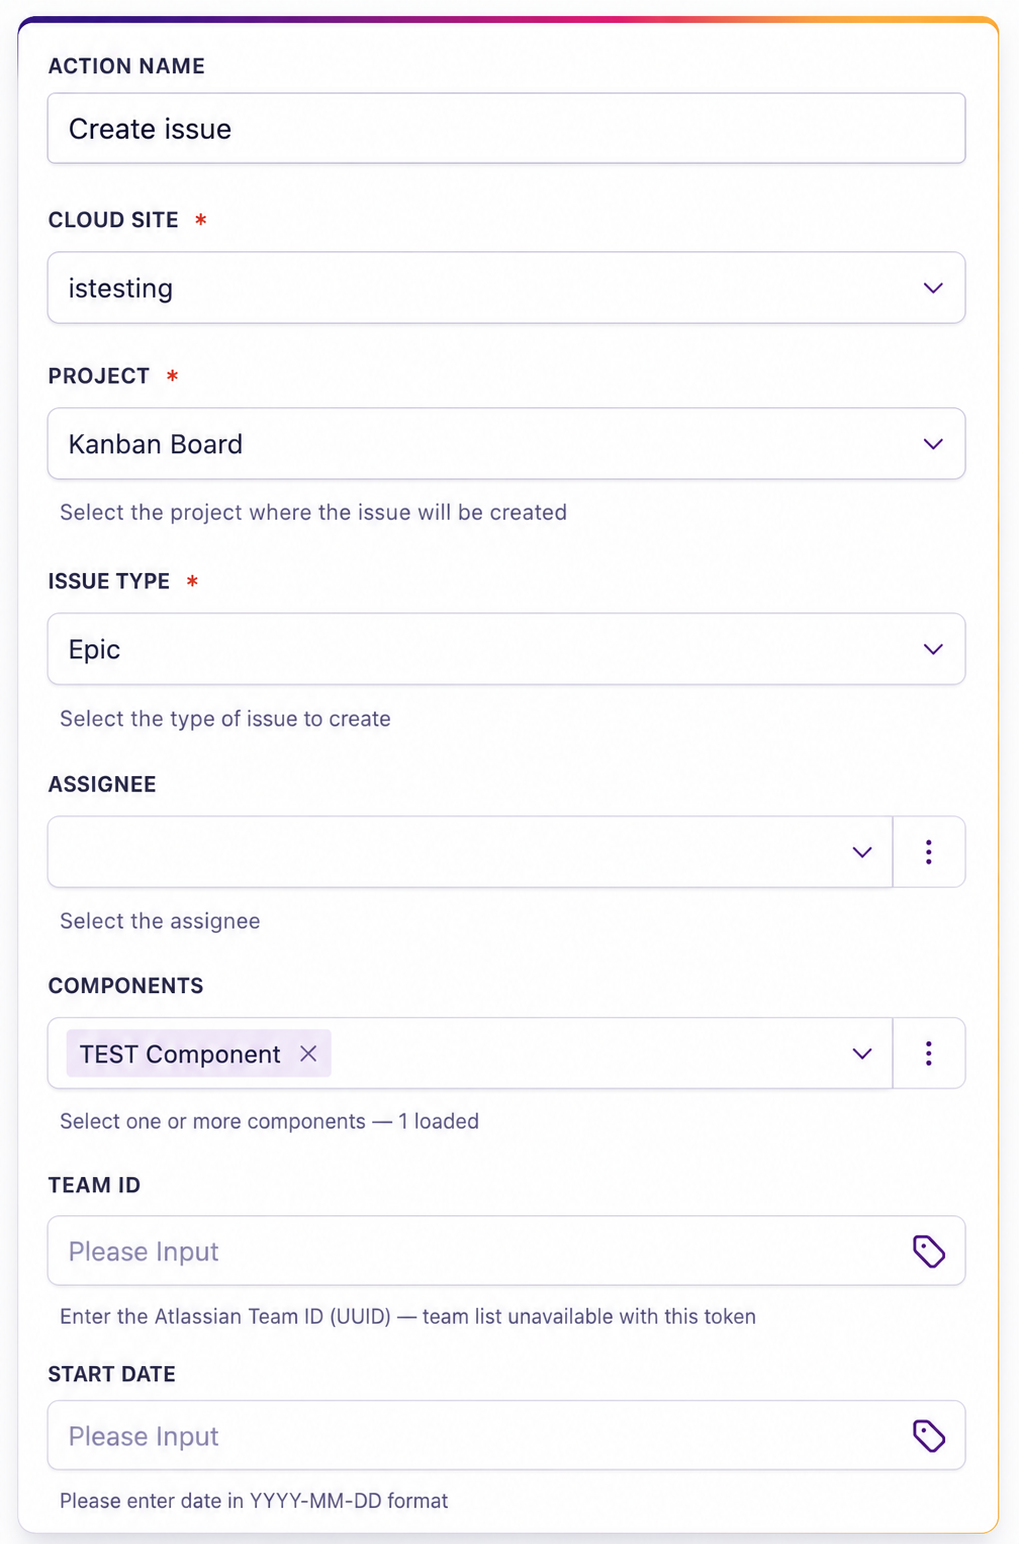
The Create Issue action requires you to select the relevant Jira Cloud Site.
Update Issue
Update an existing Jira issue with new information collected through a workflow.
For example, you could update the priority, description, assignee, status or other issue details when new information becomes available.
Issue Enrichment Actions
Add Comment to Issue
Add a comment to an existing Jira issue.
This is useful when you want to automatically provide additional context, customer information, troubleshooting details or links to related records.
Add Watcher to Issue
Add a Jira user as a watcher so they receive updates about the issue.
Add Attachment to Issue
Upload a file to a Jira issue from a Tekmatix workflow.
This could include:
Screenshots
Customer documents
Error reports
Supporting files
Technical specifications
Add Work Log to Issue
Log time or work completed against a Jira issue.
This can help technical and service teams keep more accurate records without needing to manually enter every update.
Issue Relationship Actions
Link Issue
Create a relationship between two Jira issues.
For example, one issue may:
Relate to another issue
Duplicate another issue
Block another issue
Be blocked by another issue
Linking related issues helps teams reduce duplication and understand how different requests or problems are connected.
Move Issue to Sprint
Move a Jira issue into a selected sprint.
This is useful when workflow conditions determine that an issue is ready to be scheduled, prioritised or assigned to an upcoming development cycle.
How to Connect Jira to Tekmatix
You only need to connect Jira once before using the integration across your Tekmatix workflows.
Step 1: Add a Jira Trigger or Action
Open Tekmatix and go to:
Automation → Workflows
Open an existing workflow or create a new one.
Add a trigger or action, then search for Jira inside the Apps section.
Select the Jira trigger or action you would like to use.
Step 2: Connect Your Jira Account
Inside the Jira configuration panel, click Connect your account.
The External Authentication Configuration window will open.
Enter a recognisable name for the connection, such as:
Engineering Jira
Support Jira
Product Team Jira
Internal Projects Jira
Then enter the email address associated with the Jira account and click Continue.
Step 3: Approve the Connection
You will be redirected to the Atlassian authorisation screen.
Review and approve the requested Jira permissions.
Once approved, you will be returned to the Tekmatix Workflow Builder and the integration will show as connected.
Step 4: Select the Correct Cloud Site
Choose the Jira Cloud Site that the workflow should read from or write to.
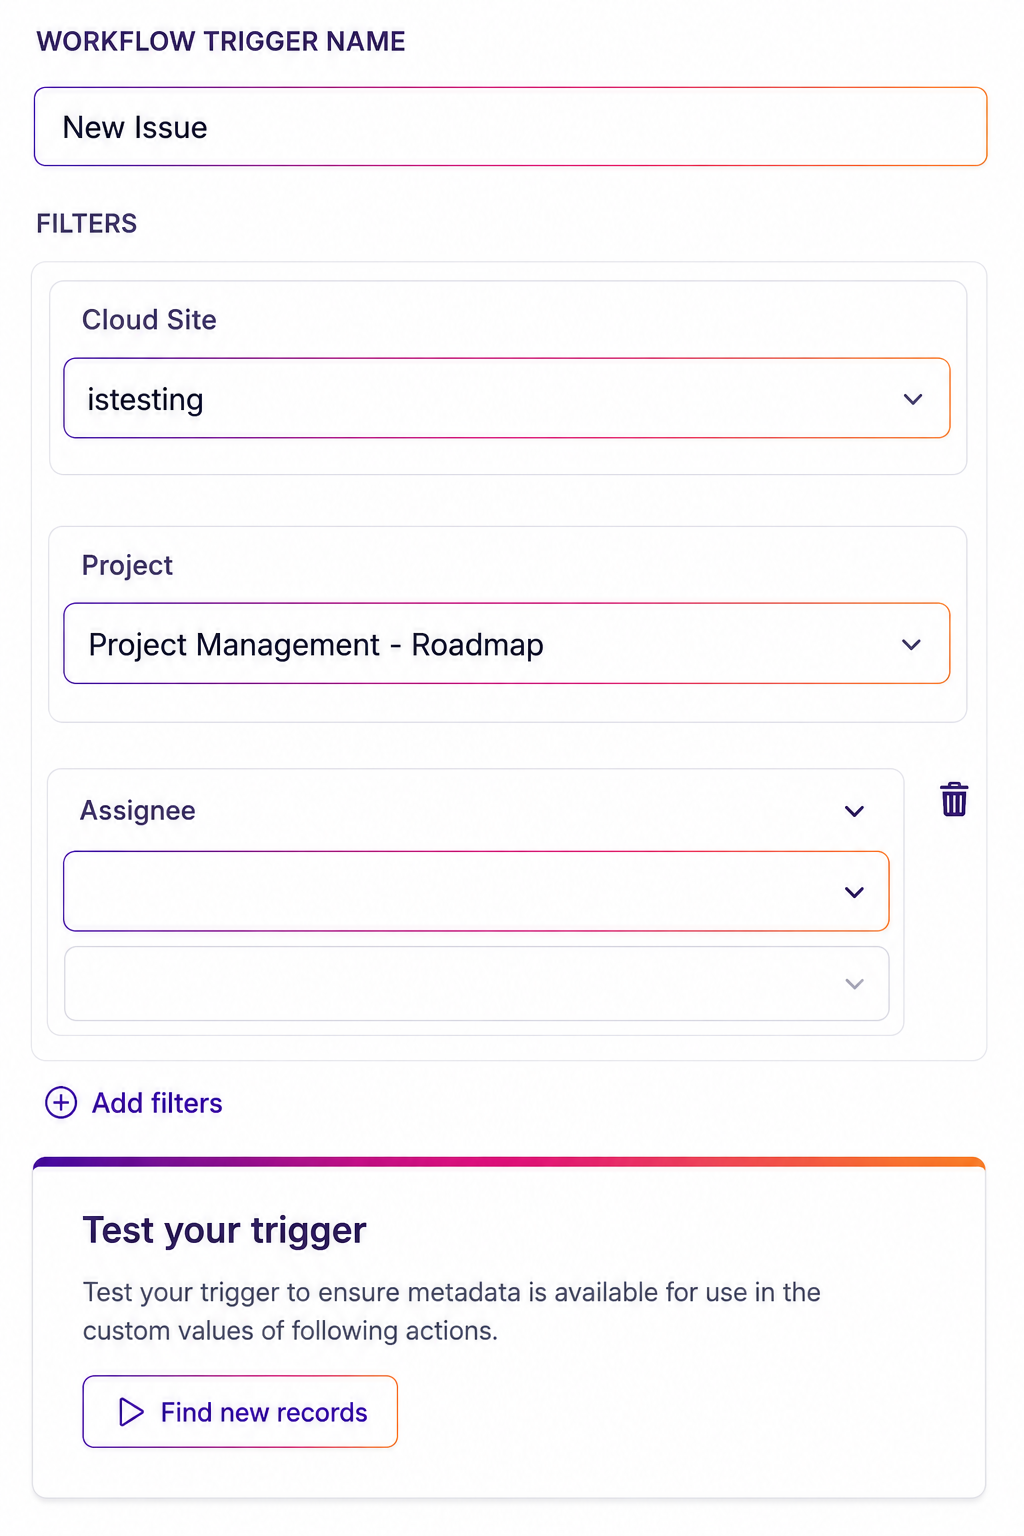
This is required when using the Create Issue action and is available as a filter for Jira triggers.
Selecting the correct Cloud Site is important when your Atlassian account has access to more than one Jira environment.
Jira Automation Use Cases
The Jira integration can support customer service, software development, product management and internal operations.
Here are two practical examples.
Use Case 1: Notify a Customer When an Issue Is Resolved
Goal
Automatically notify a customer when a Jira issue has been completed.
Workflow Setup
Trigger: Updated Issue
Filter: Issue status equals Done
Action: Find the related contact in Tekmatix
Action: Send a resolution email or message
Example
A customer reports a technical problem and the support team creates a Jira issue.
An engineer investigates the problem and updates the issue status to Done.
Within approximately five minutes, the Tekmatix workflow detects the update, matches the Jira issue to the customer who originally reported it and sends a resolution message containing the fix summary.
This closes the communication loop without requiring the engineer or support team to manually send another message.
The technical team can continue working inside Jira while Tekmatix manages the customer communication.
Use Case 2: Link Related or Duplicate Issues
Goal
Identify and connect Jira issues that relate to the same external request, support ticket or feature idea.
Workflow Setup
Trigger: New Issue
Action: Find Issues using a shared reference
Action: Link Issue
Relationship type: Relates to or Duplicates
Example
A new Jira issue is created with an external support ticket number or feature request reference.
The Tekmatix workflow searches Jira for other issues containing the same reference.
When a matching issue is found, the workflow automatically links the new issue to the existing record.
This helps your team:
Reduce duplicate investigation
Keep related issues connected
Improve visibility across teams
Find the full history of a problem more easily
Maintain cleaner Jira project records
Use Case 3: Create a Jira Issue From a Support Form
Goal
Turn incoming customer support requests into Jira issues automatically.
Workflow Setup
Trigger: Tekmatix form submitted
Action: Find Project
Action: Create Issue
Action: Add Attachment to Issue, where required
Action: Add Watcher to Issue
Example
A customer submits a bug report through a Tekmatix form.
The form collects:
Customer name
Email address
Product or service affected
Description of the problem
Priority
Screenshots or attachments
The workflow finds the correct Jira project and creates a new issue using the submitted information.
It can then upload the customer’s screenshots, add the appropriate support or engineering manager as a watcher and store the Jira issue reference against the customer’s Tekmatix contact record.
This gives both teams a connected process without requiring someone to manually copy information between platforms.
Use Case 4: Move Approved Work Into a Sprint
Goal
Automatically move Jira issues into a sprint when they have been approved or prioritised.
Workflow Setup
Trigger: An approval, pipeline update or internal workflow event
Action: Find Issue
Action: Update Issue
Action: Move Issue to Sprint
Example
A feature request moves into an Approved stage inside a Tekmatix pipeline.
The workflow finds the related Jira issue, updates its priority and moves it into the next planned sprint.
This allows sales, customer success, product and development teams to stay aligned without relying on manual handovers.
Important Testing Information
Always test Jira triggers and actions before publishing your workflow.
When testing a trigger, make sure a matching issue exists in the selected Jira Cloud Site.
When testing an action, remember that the workflow may create or update real Jira records.
Use clearly labelled test records, such as:
TEST ISSUE – DELETE AFTER TESTING
After testing:
Confirm the issue appears in the correct Jira project
Check that mapped fields contain the correct information
Verify that comments, watchers, files or work logs were added successfully
Remove any unnecessary test records
Run a full workflow test before publishing
Connect Jira With Your Customer-Facing Automations
The new Jira integration helps connect the work happening behind the scenes with the customer experience being managed inside Tekmatix.
Your development and technical teams can continue using Jira as their main workspace, while Tekmatix handles the surrounding automation, communication and customer record updates.
This means fewer manual handovers, cleaner information, faster customer communication and a more connected workflow across your business.
Open Automation → Workflows inside Tekmatix and search for Jira in the Apps section to begin building your first Jira automation.

Copyright © 2026 TekMatix. All rights reserved | [email protected]